Instructions for setting up the dentaleyepad settings in

From the menu item Settings, select the lowest entry “General”.

In the window that now appears, select the entry “Image sources” under Couplings.

Here you switch to the “dentaleyepad” tab (1).

Please enter in the field “dentaleyepad-Import” under “Import path” the same path you have already selected in the dentaleyepad control center (2) and confirm
the information with the “Apply” button (3).

Here again the view of the dentaleyepad control center:

⚠ Attention:

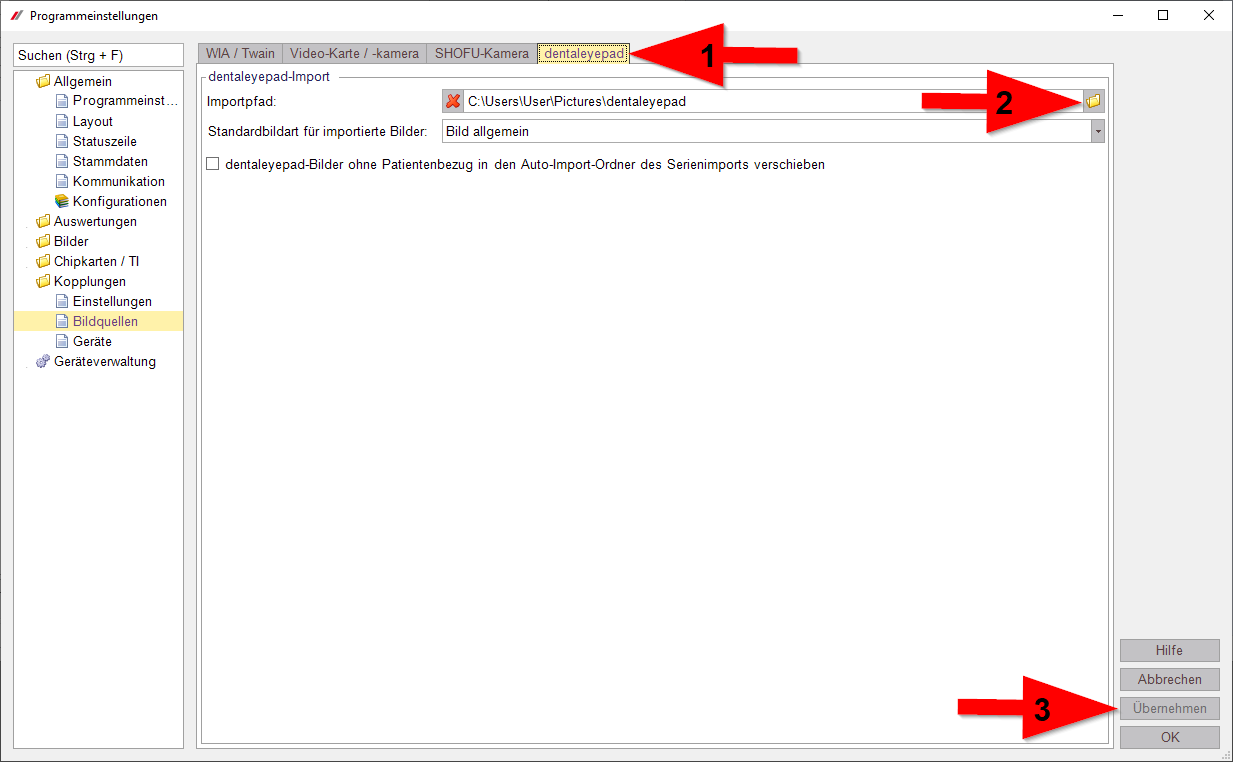
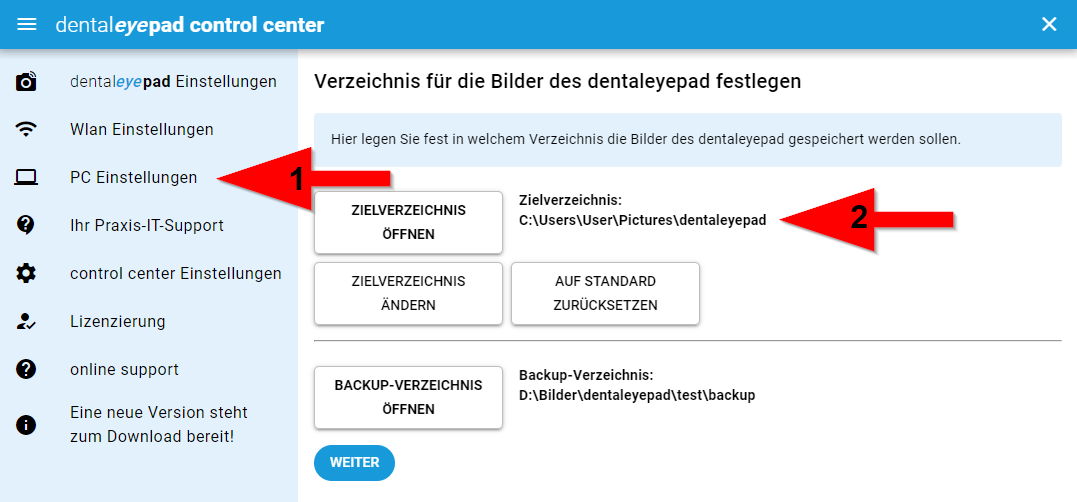
Please set this path setting only on a single Ivoris PC. (Ivoris must be running on this PC if the images are to be fetched from ivoris).
Otherwise, if the path is set on multiple ivoris PCs, multiple reads of an image could occur.

For “Default image type for imported images”, you can select “General image”, for example. All images without an image tag are then automatically assigned this image type in Ivoris.

To avoid confusion caused by different folders, we recommend NOT activating the option “dentaleyepad- move images without patient reference to the auto-import folder of the serial import”. This ensures that all dentaleyepad images, with or without patient reference, always end up in the same folder.

Now to the types of images:

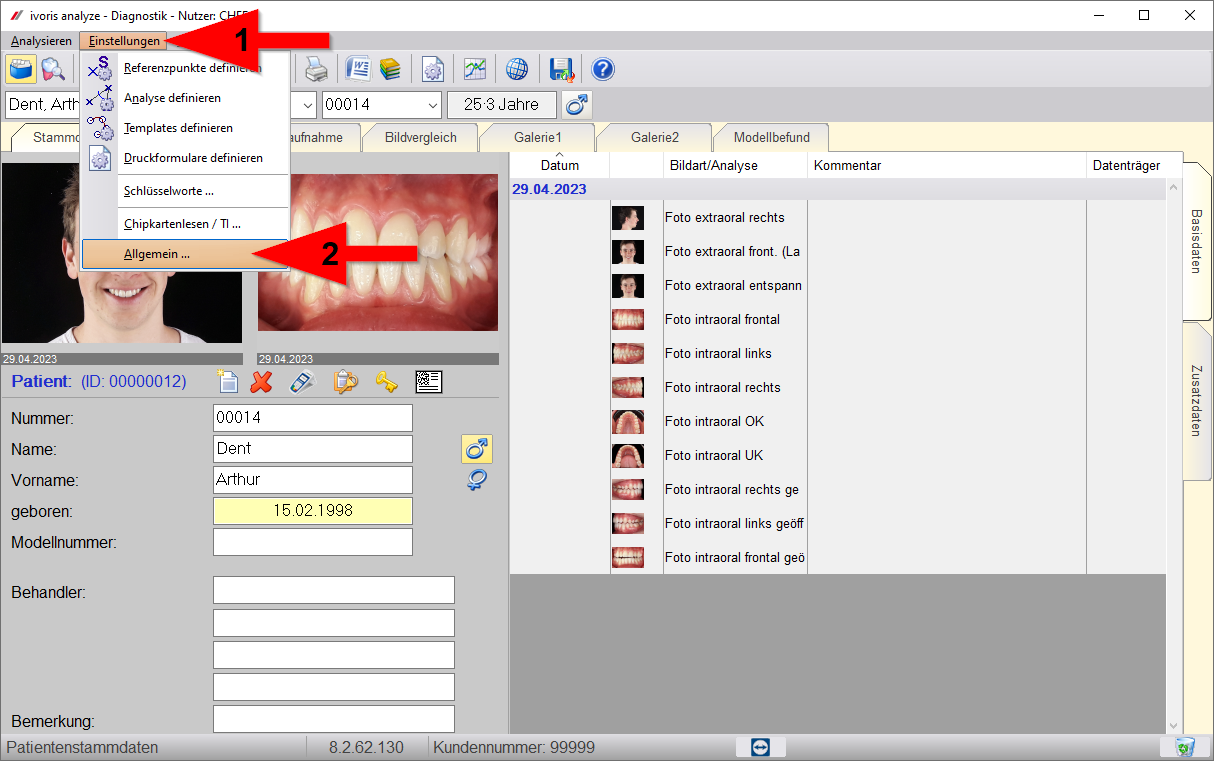
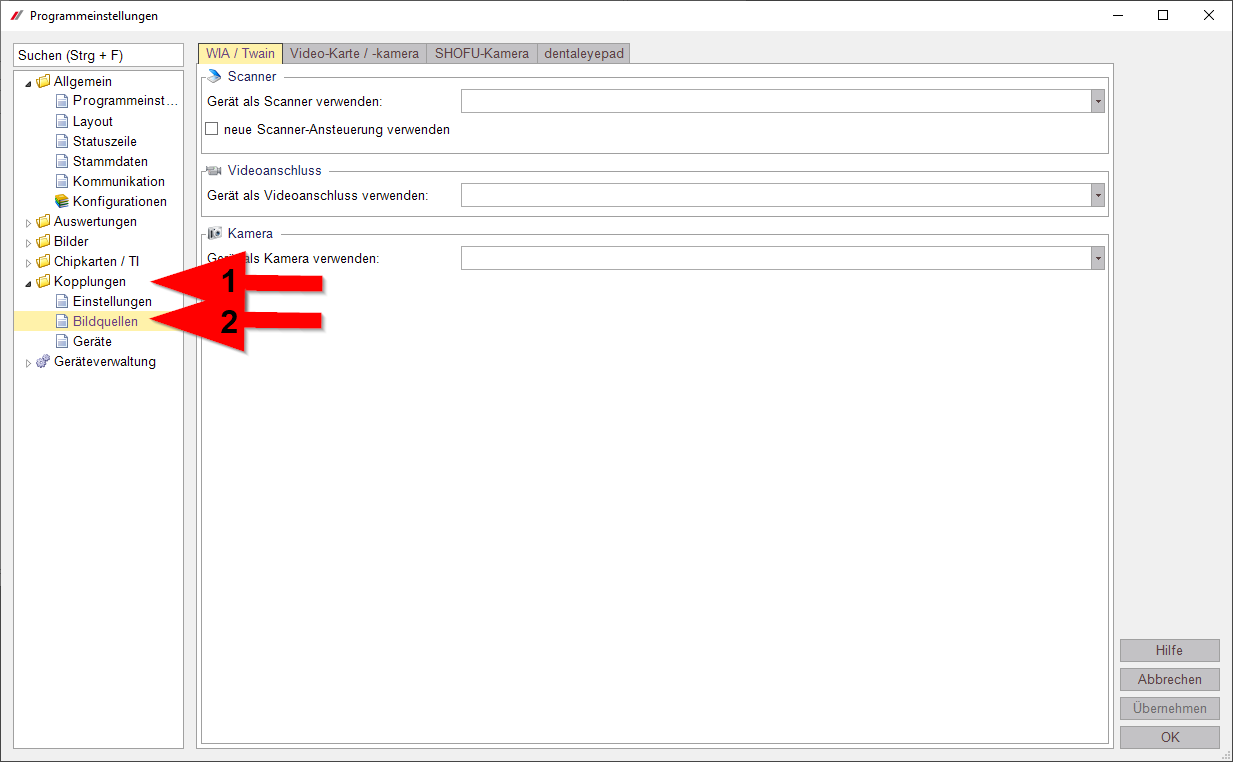
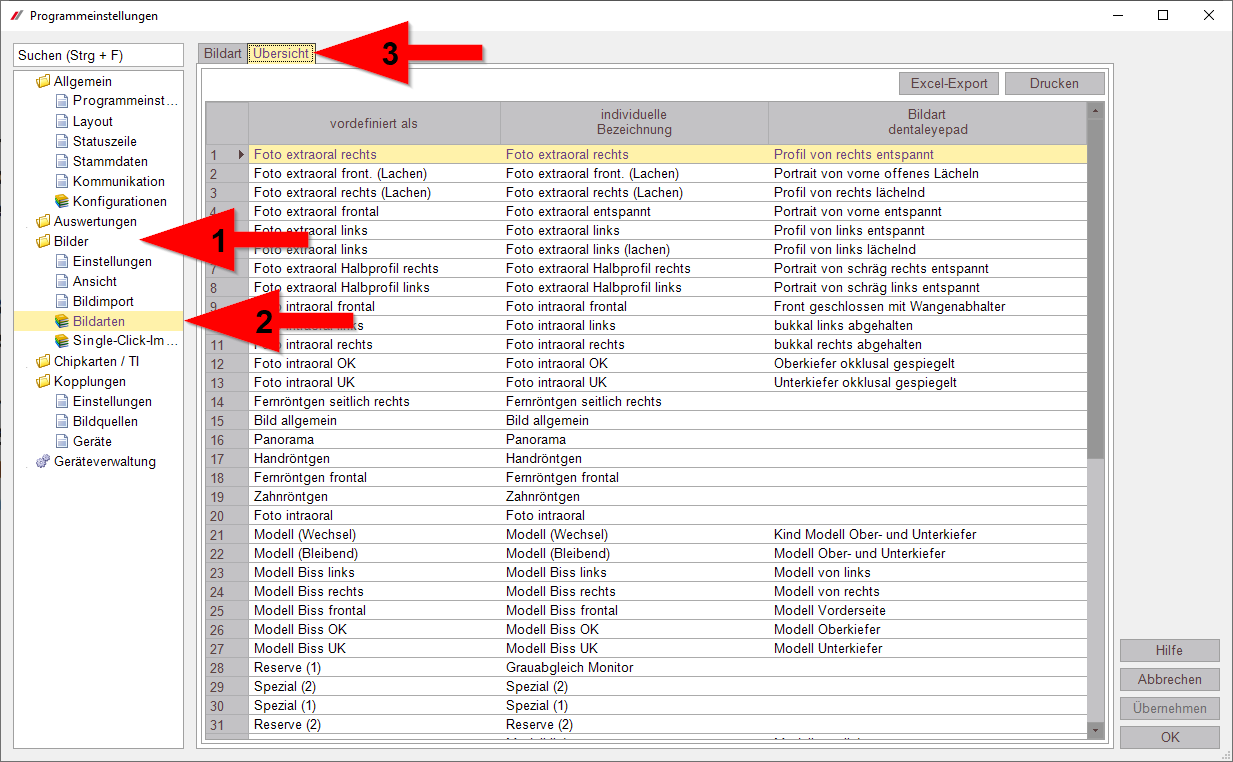
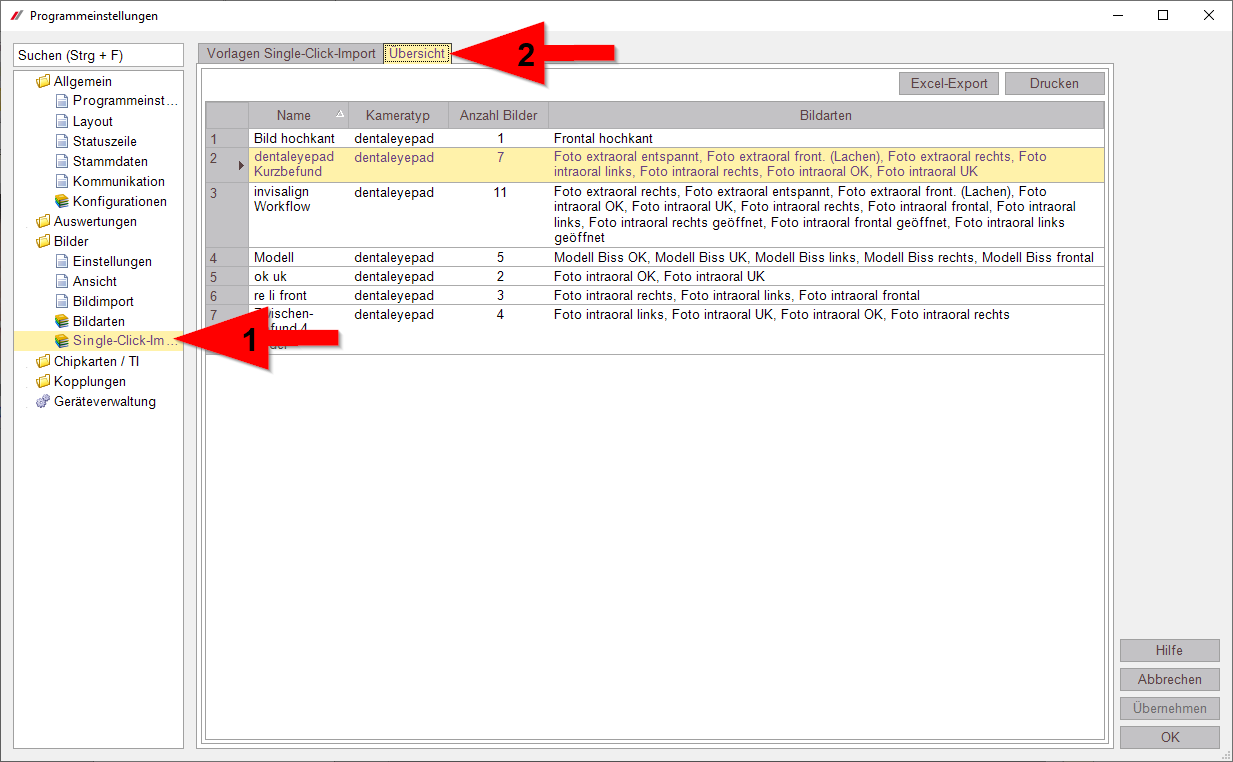
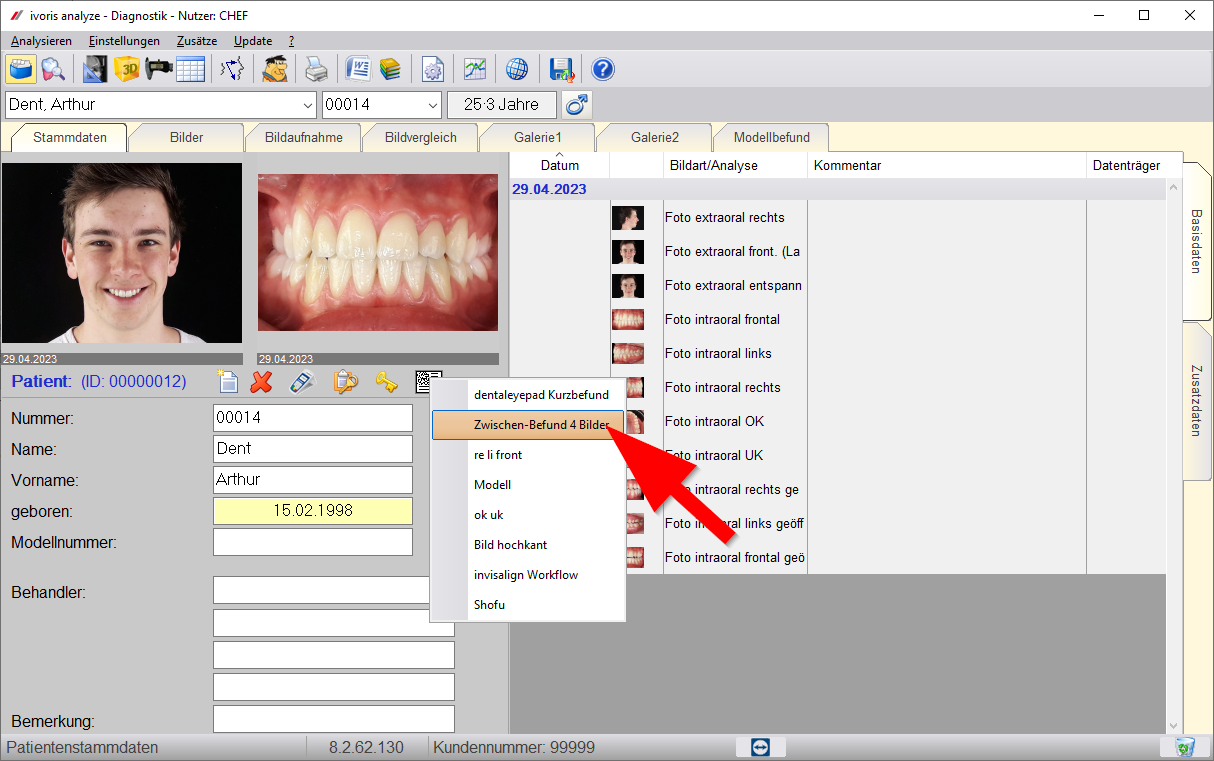
Click on “Images – Image types” (1 and 2) on the left and then on Overview (3) at the top.
Here you can see the image types predefined in ivoris on the left and the corresponding image types on the dentaleyepad on the right.
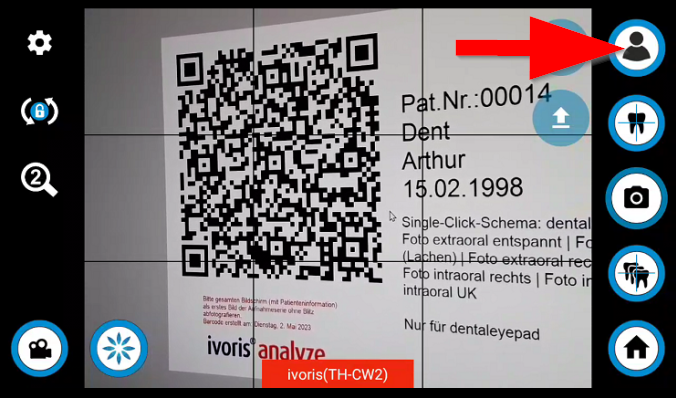
Tip: When you click in a row, you can move it up and down with the right mouse button. The sequence set here will also be applied later in the master data view.

Assignment of ivoris image types to dentaleyepad image types

If you select a row by single clicking on it, you can then click on the “Image Type” tab at the top and reassign it.

Here you can see under “Image type” that the dentaleyepad image type “buccal left held” (2) is assigned to the Ivoris image type “Photo intraoral left” (1).

For example, if you always acquire the lateral intraoral exposures with a mirror, you can set the dentaleyepad image type to “buccal left closed mirrored”.

If you then switch back to “Overview” at the top, ivoris will ask you if you want to save the changes. Confirm this with “Yes” if you want to save the changes.

An overview of all dentaleyepad image types with sample images can be found here.

Working with automatic image sequences
(in ivoris these are called “single-click imports”)

In ivoris, it is possible to save recurring image sequences as so-called single-click imports and transfer them to the dentaleyepad. To do this, go to “Single-Click Imports” (1) on the left side and select the “Overview” tab at the top (2)

Here you can see all the single-click imports you may have already worked with.

To edit a single-click import (a sequence of images), select the corresponding line and then switch to the “Templates single-click import” tab above

Notice:
This overview of single-click imports is always sorted alphabetically by name, unlike the previous overview of image types. The order cannot be defined freely, but only by the beginning of the name.

To edit an image sequence, select it and then switch to the “Templates Single-Click Import” tab at the top (1)

If you have already worked with a normal or a SHOFU camera and will only work with the dentaleyepad in the future, you can simply redefine your previous image sequences for the dentaleyepad by activating “dentaleyepad” (2).

If you still want to use other cameras, you can duplicate your existing image sequences, rename the copy, and then again mark “dentaleyepad” here.

It makes sense to include “dentaleyepad” in the name of the image sequence, so that the image sequences can be better distinguished later when selecting the QR code.

⚠ Attention:
If you have previously worked with mirrored image templates, you must remove the mirroring in the dentaleyepad image sequence, as the images are already mirrored by dentaleyepad.

You can see by the small green check mark (3) whether a mirroring is defined in an image type.

In the example, the last image type “Photo intraoral UK” has a reflection.

To remove the reflection just click the button with the small green checkmark. (3)

In the window that now opens, mark “no mirroring” and confirm again with “OK”.

Of course, you can also create completely new image sequences using the “New” button.

With the green “Plus” button you can add new image templates, with the red “Cross” you can delete existing image templates.

By clicking on the “Overview” tab (1), you can finally check whether all relevant image sequences are also available with the camera type entry “dentaleyepad” (2).

If everything is OK, the settings window can be closed with “OK” (3).

To photograph a sequence of images with the dentaleyepad, right-click the QR code icon in the “Master data” view. A selection of all available image sequences appears.

As soon as you click on one, the corresponding QR code is displayed in full format.

Now start the camera app on the dentaleyepad and scan the QR code with the button at the top right.

⚠ Important:
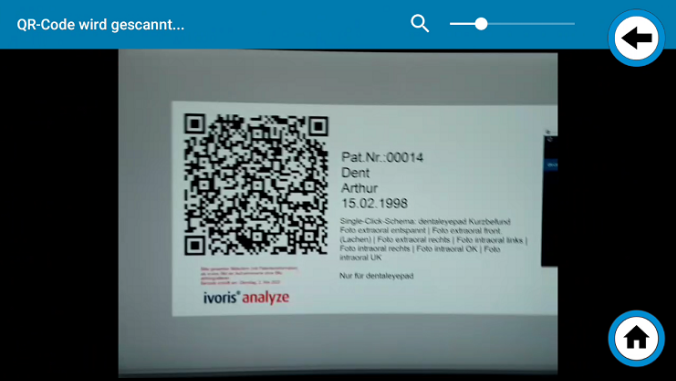
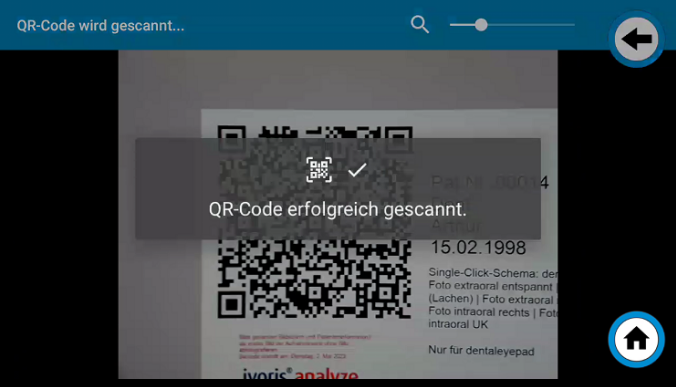
The QR code must always be “scanned” and not “photographed”. Only when scanning, the dentaleyepad can identify the code and show the current patient in the display.

After successful scanning, the message “QR code scanned successfully” appears. Then both the patient name and the first overlay of the image sequence are displayed.

Have fun taking pictures with ivoris.