


Instructions for setting up the dentaleyepad settings in
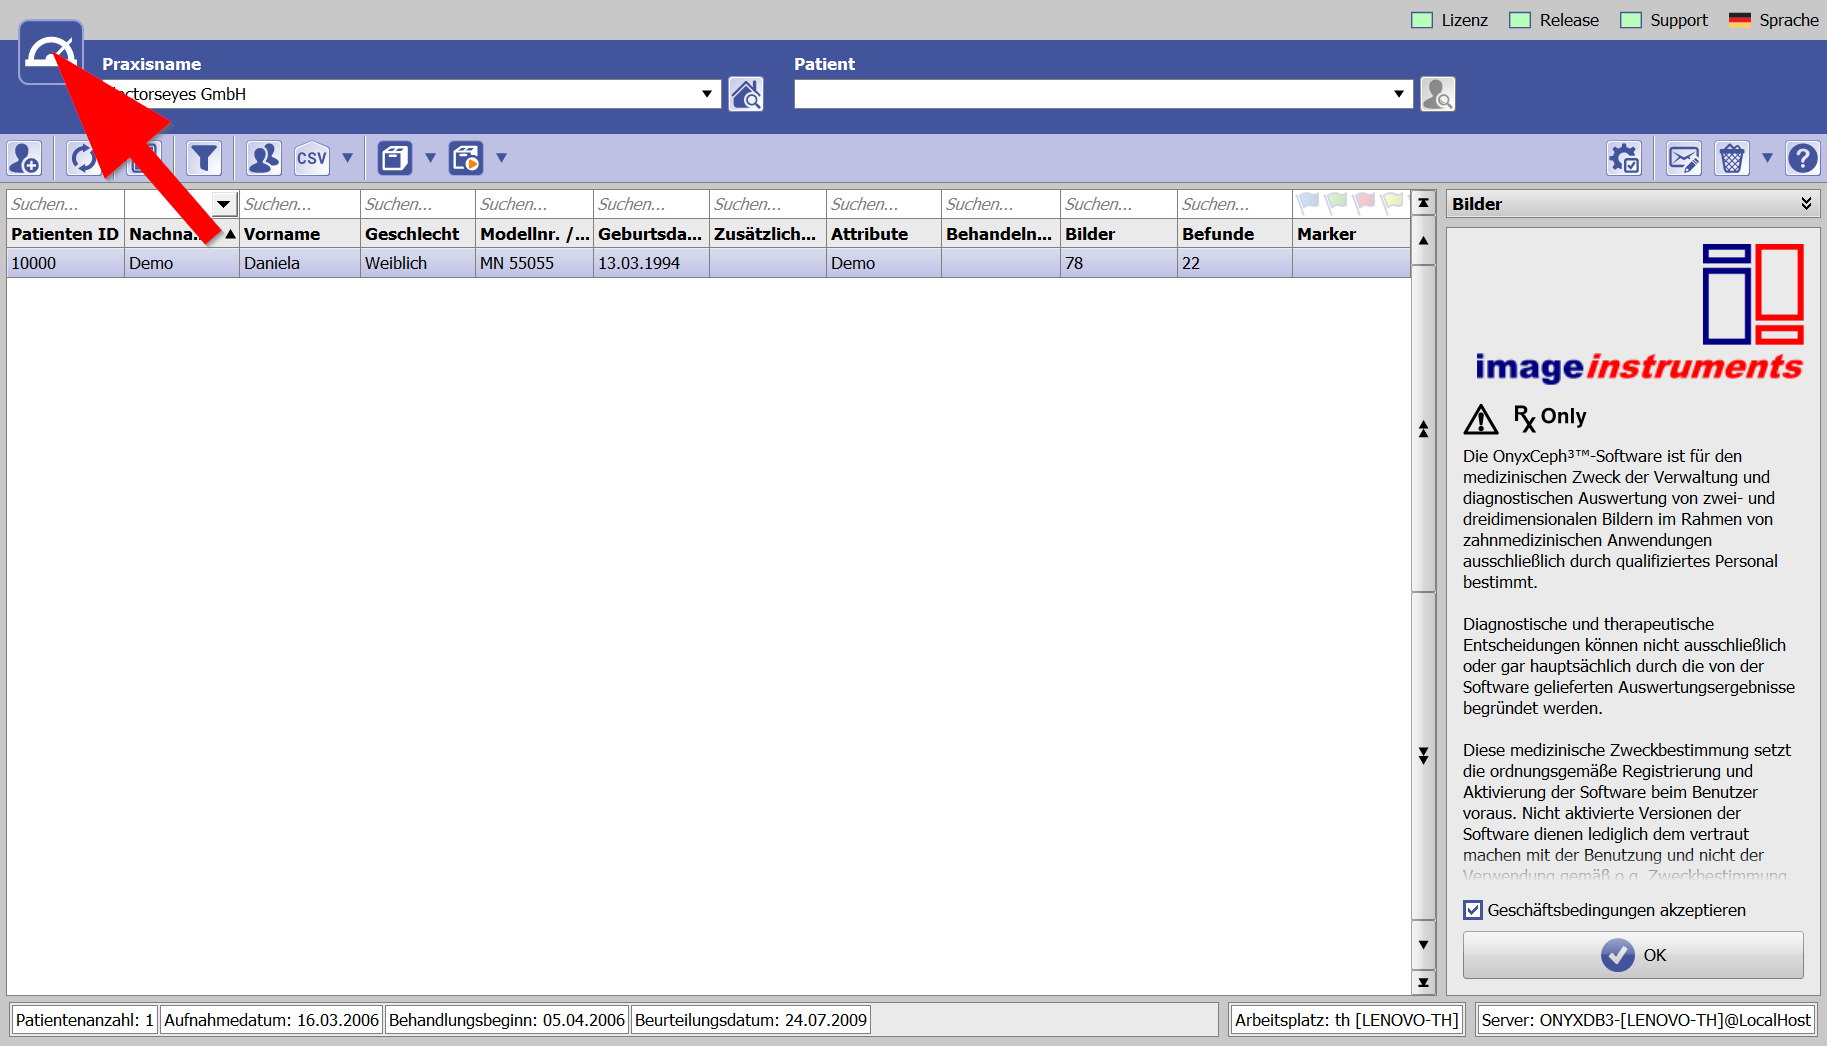
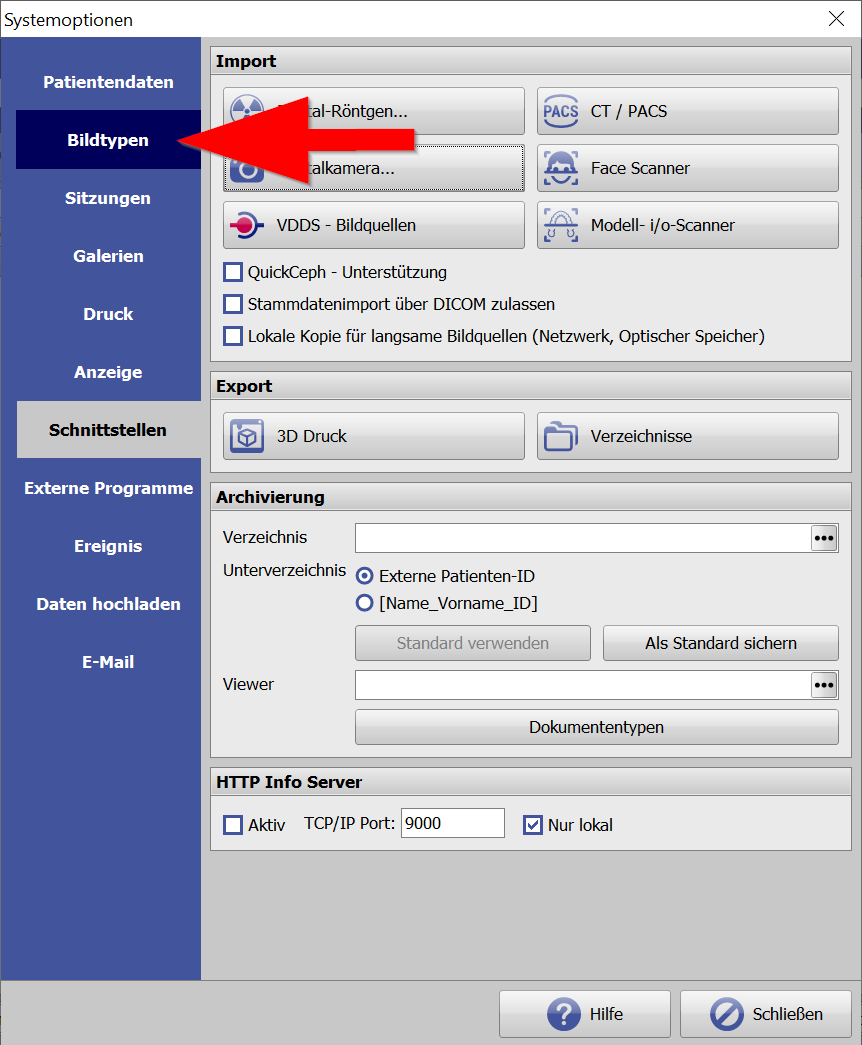
Right-click in the OnyxCeph logo in the upper right corner and select System Settings.
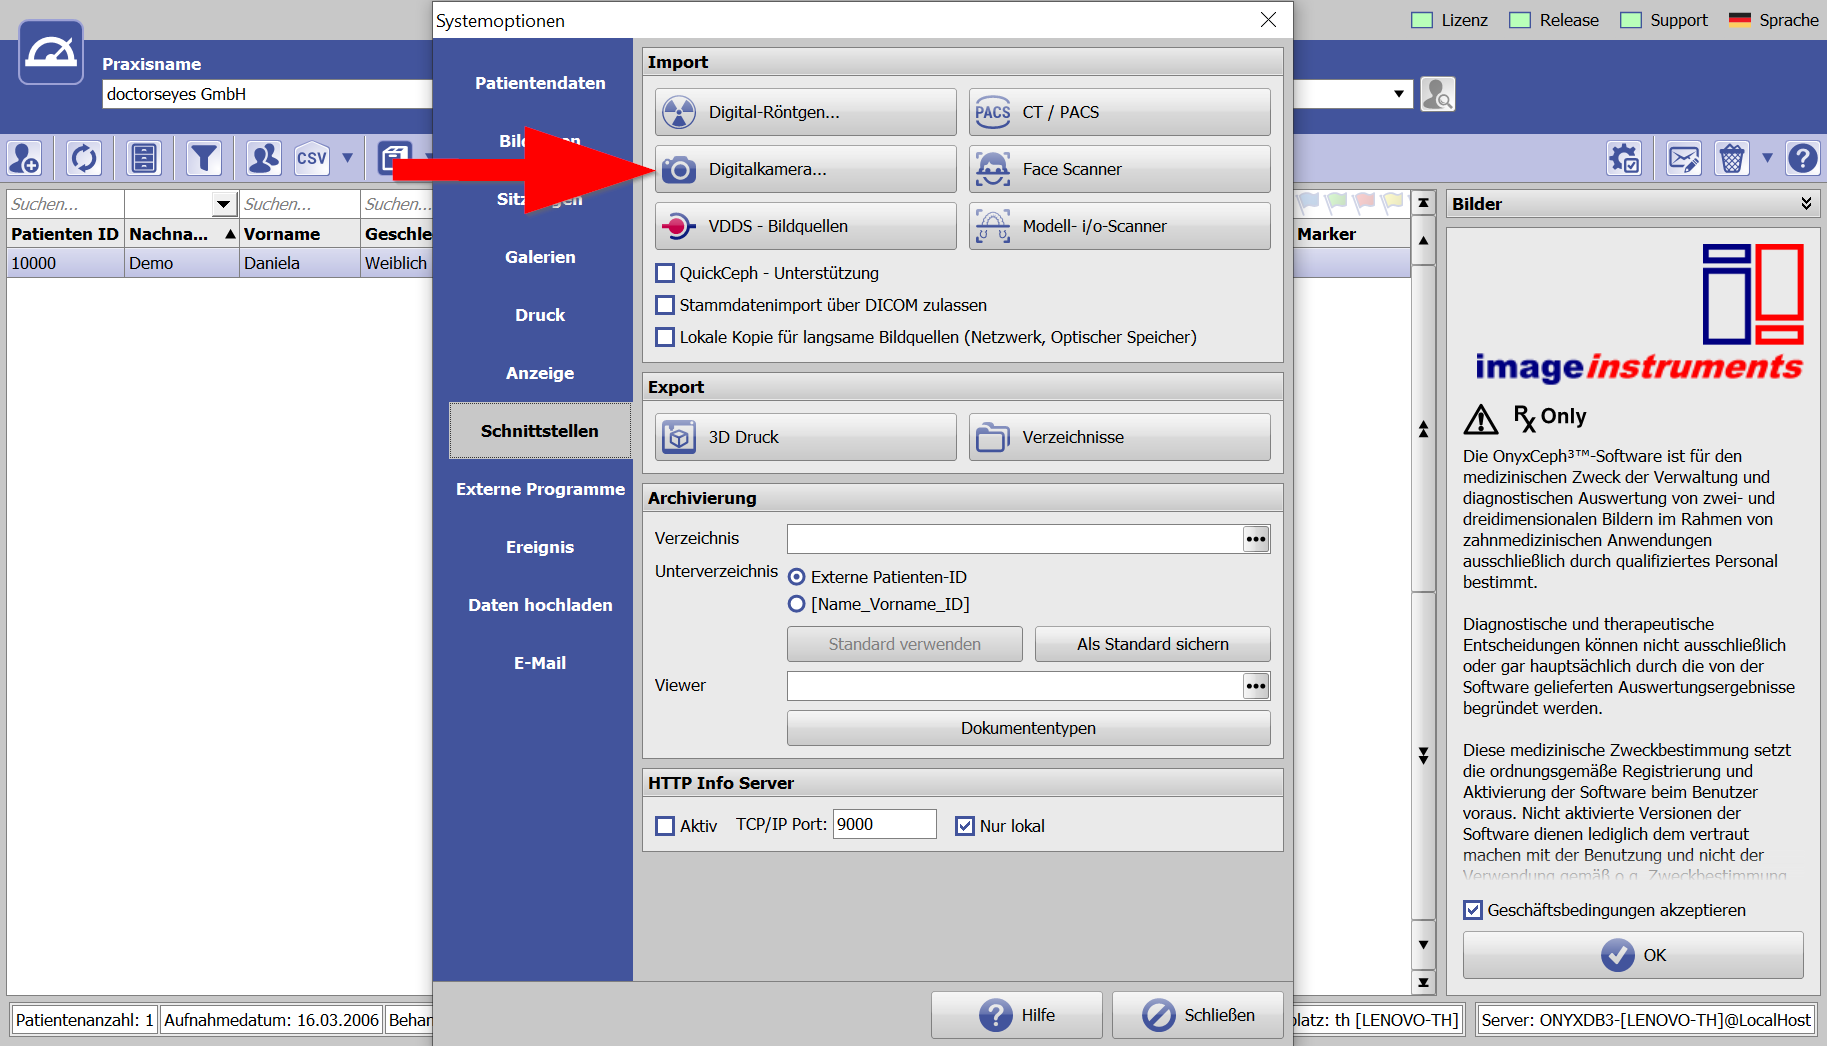
Then select the “Interfaces” area
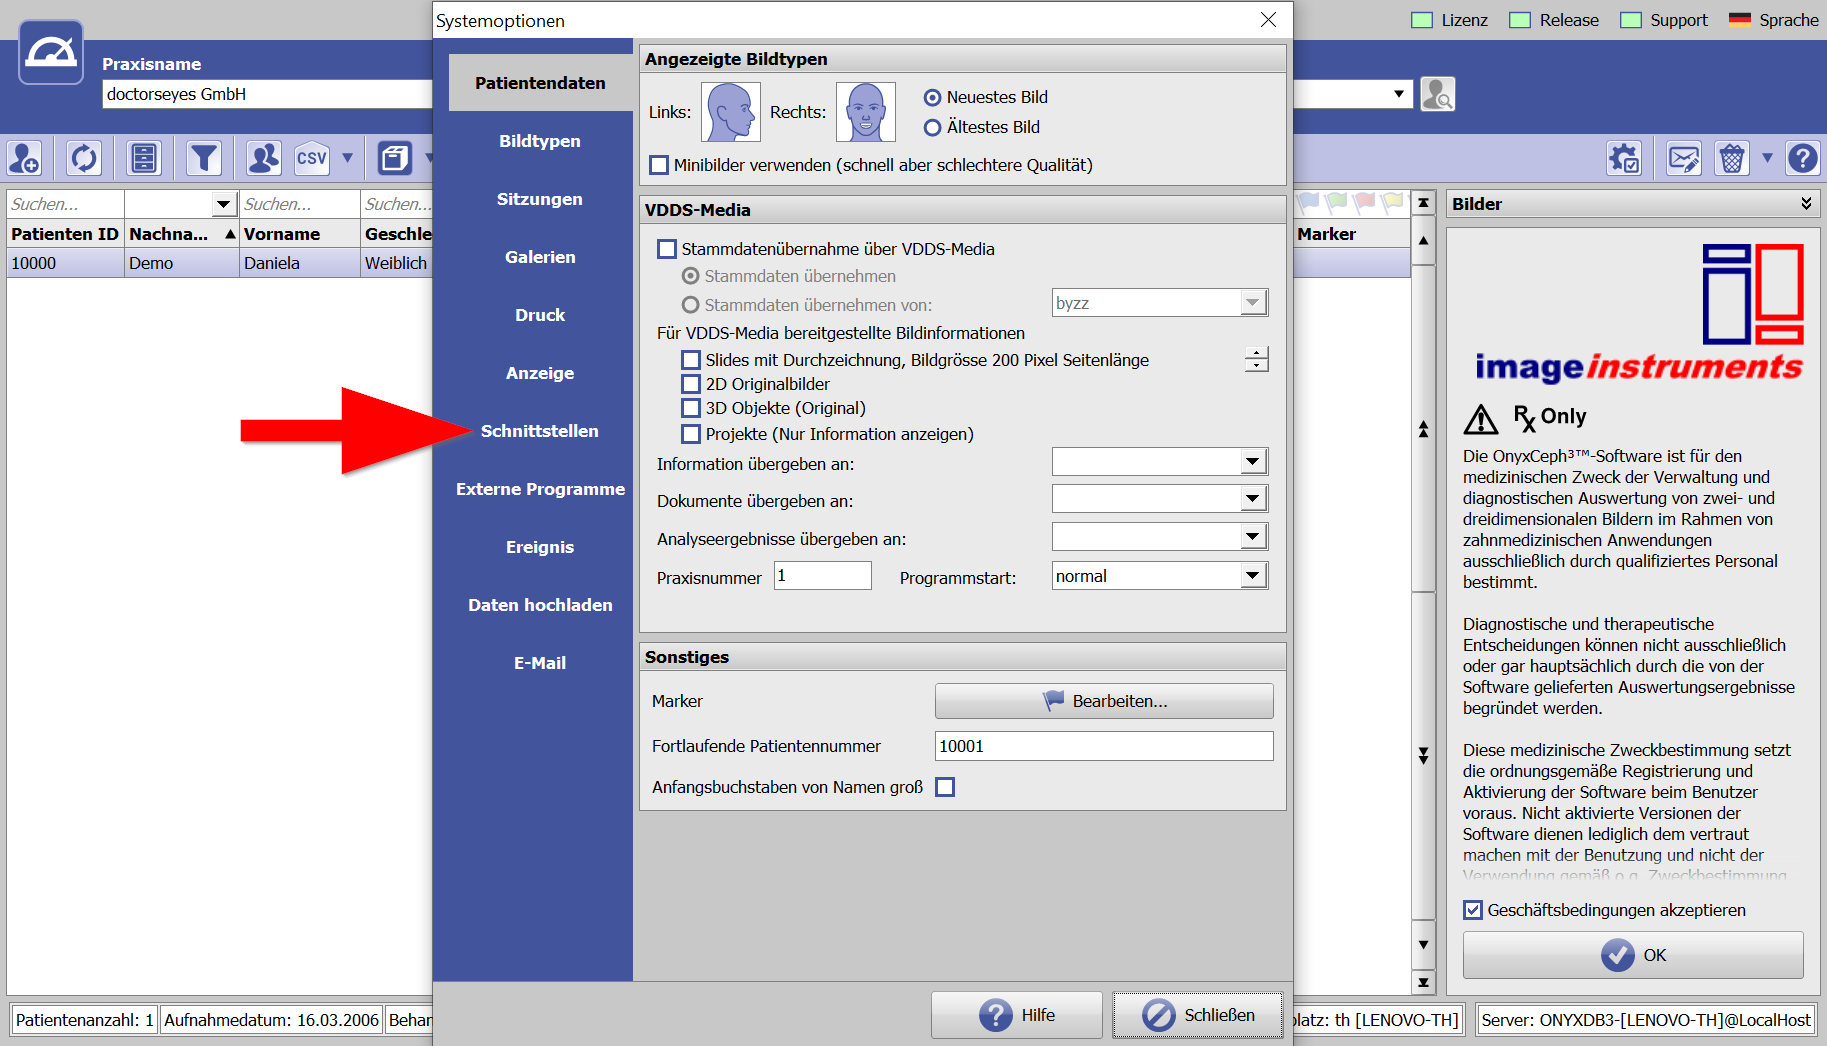
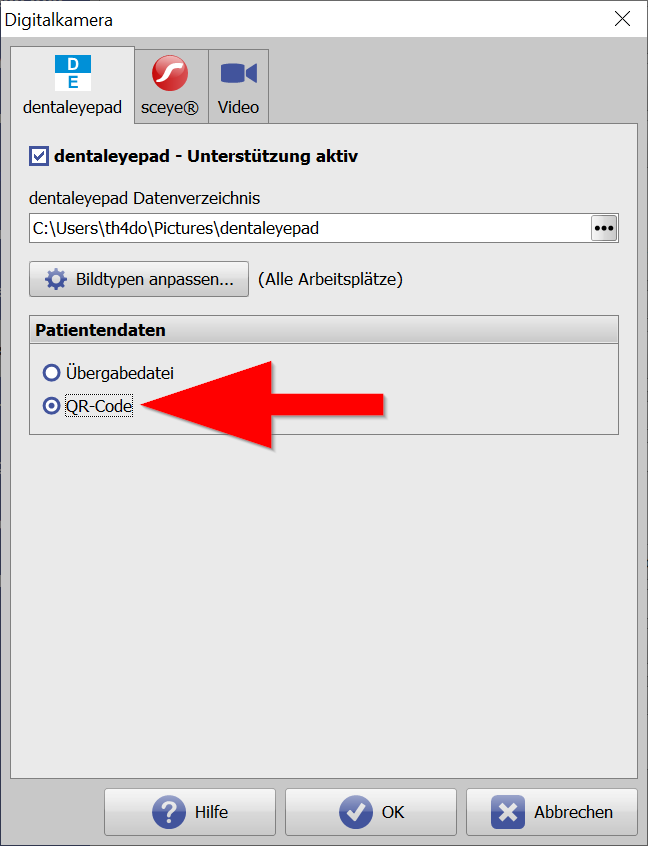
Select the “Digital Camera…” section here.
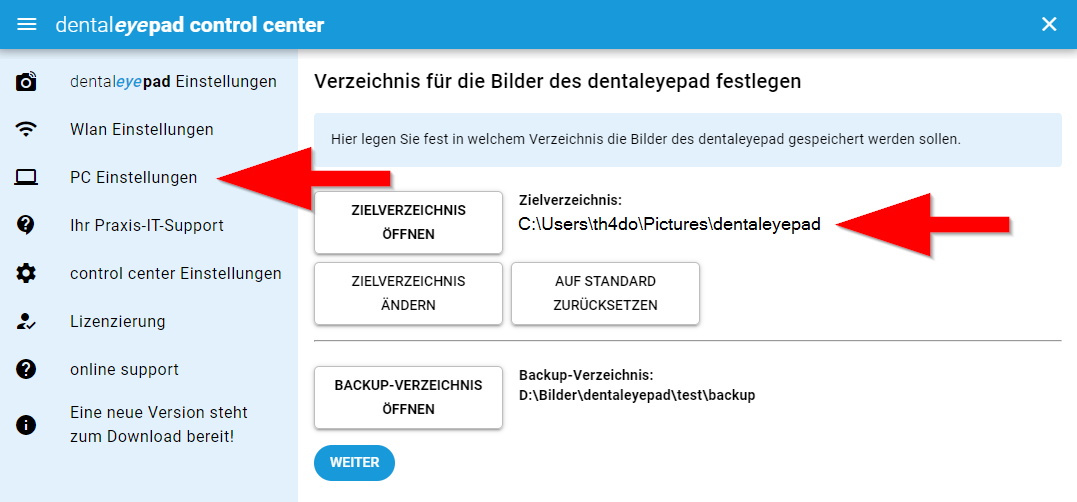
Activate the checkbox “dentaleyepad – support active” and select the same path under “dentaleyepad data directory” that you have already set in the dentaleyepad control center.
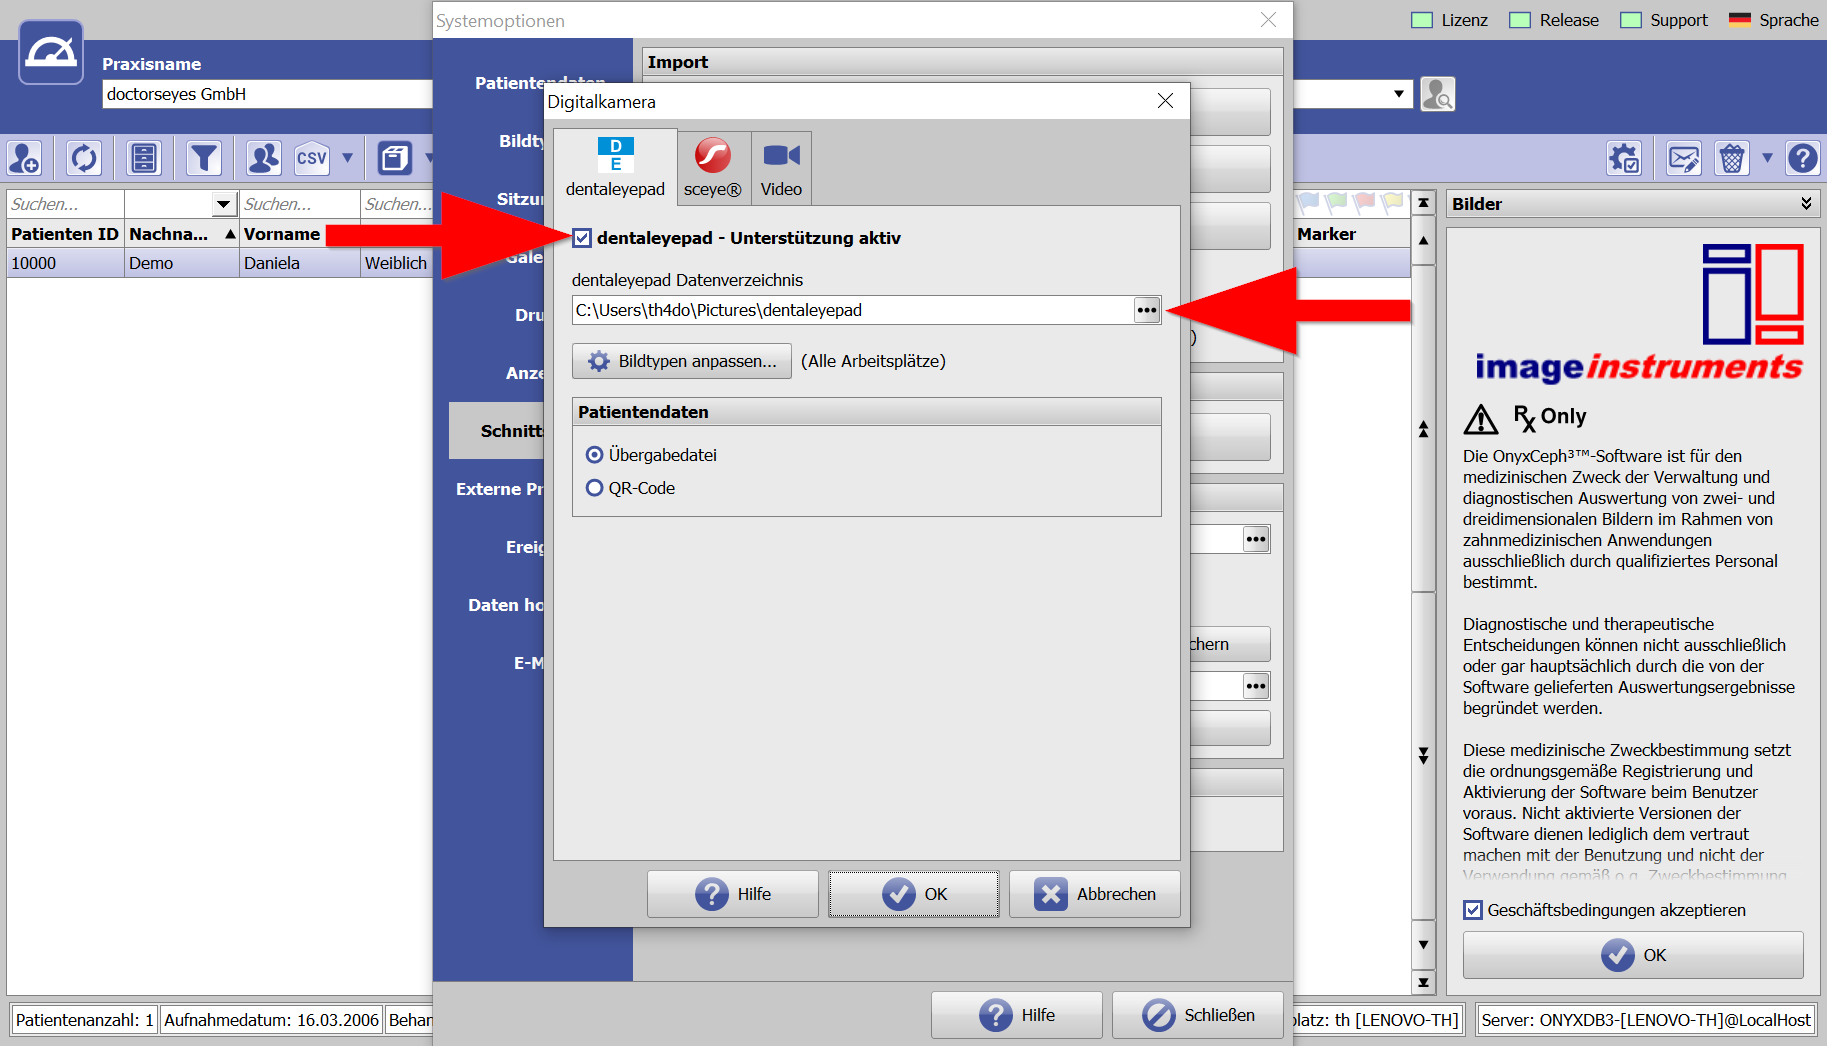
Important:
If you want to capture images at multiple OnyxCeph workstations, you must set this path at each workstation.
For this purpose it is necessary to create a common network folder and select it in the dentaleyepad control center as well as in all OnyxCeph installations.
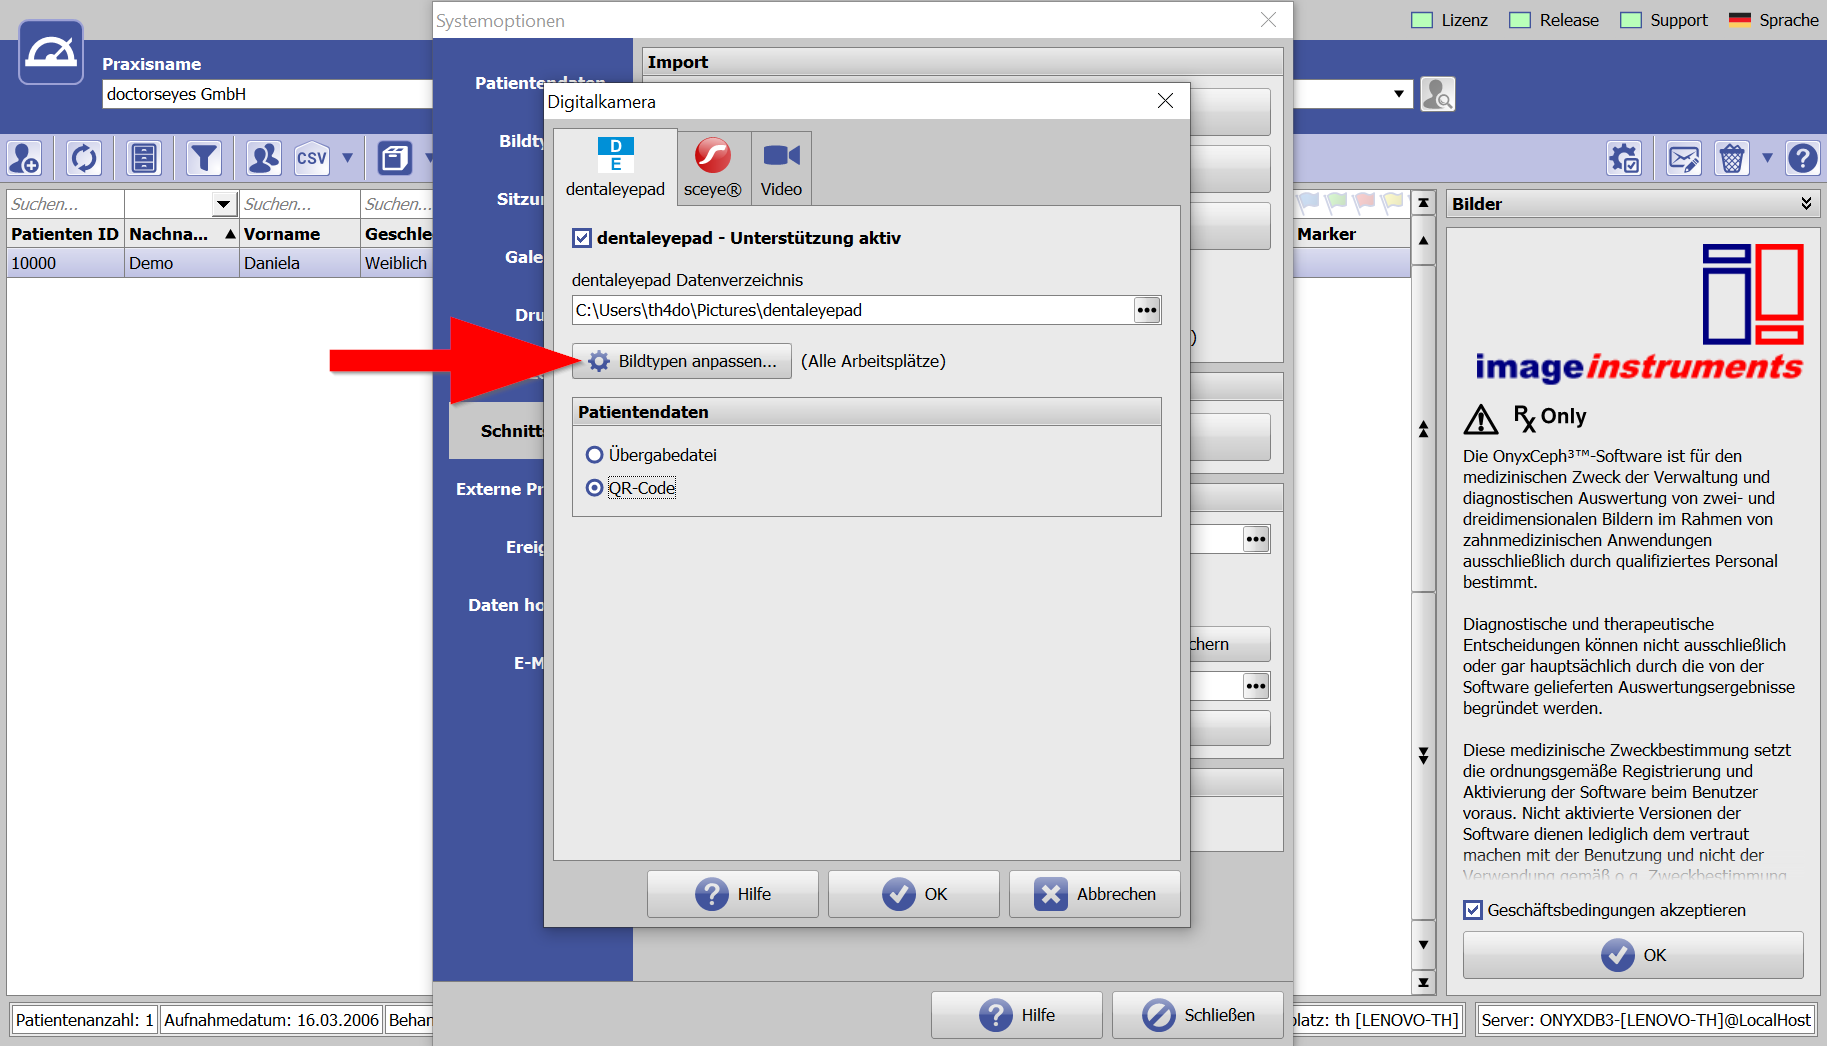
Next you can optionally select the “Customize image types” button.
All standard image types of OnyxCeph are already assigned to corresponding dentaleyepad image types here.
If you have created your own image types in OnyxCeph, you can freely assign them to the corresponding image types on the dentaleyepad page.
There are now over 110 different types of images, but if the type of image you want is still not there, feel free to let us know your wishes. The best way to do this is with a small sketch. We are always trying to implement all wishes.
An overview of all dentaleyepad image types with sample images can be found here:
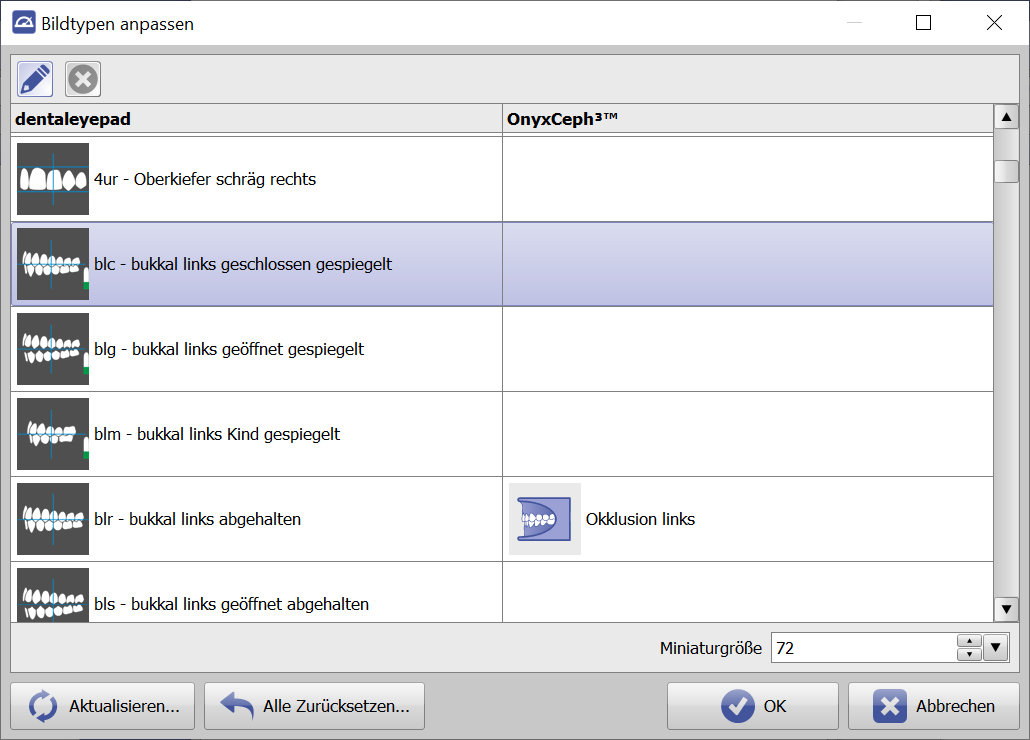
Do you take your intraoral lateral exposures with or without a mirror?
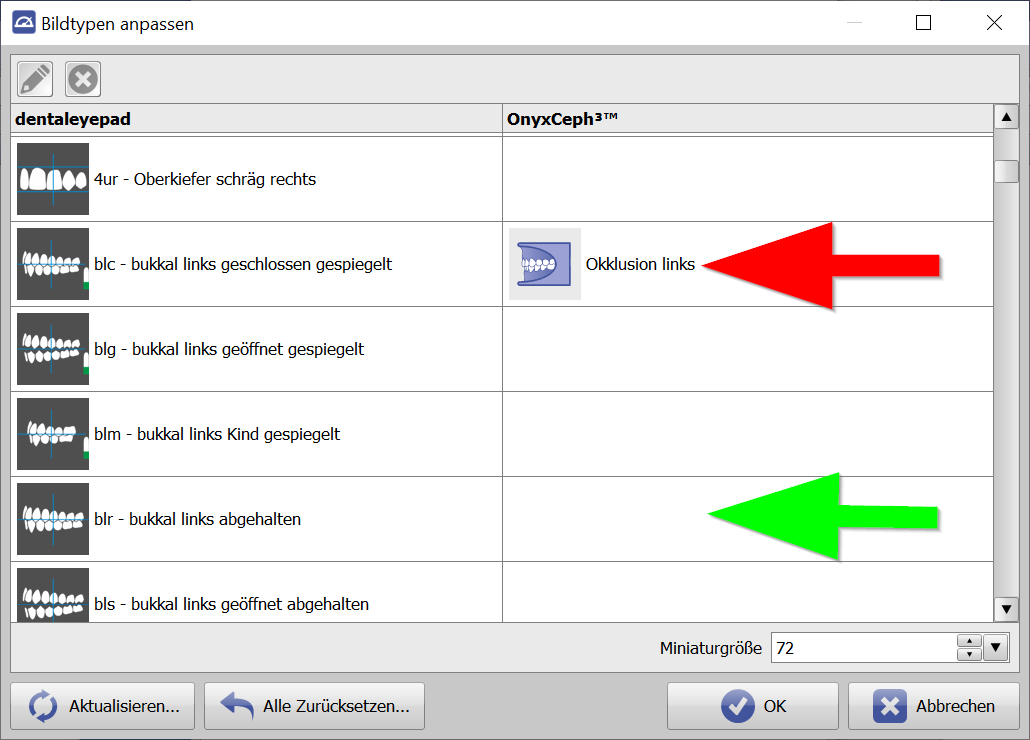
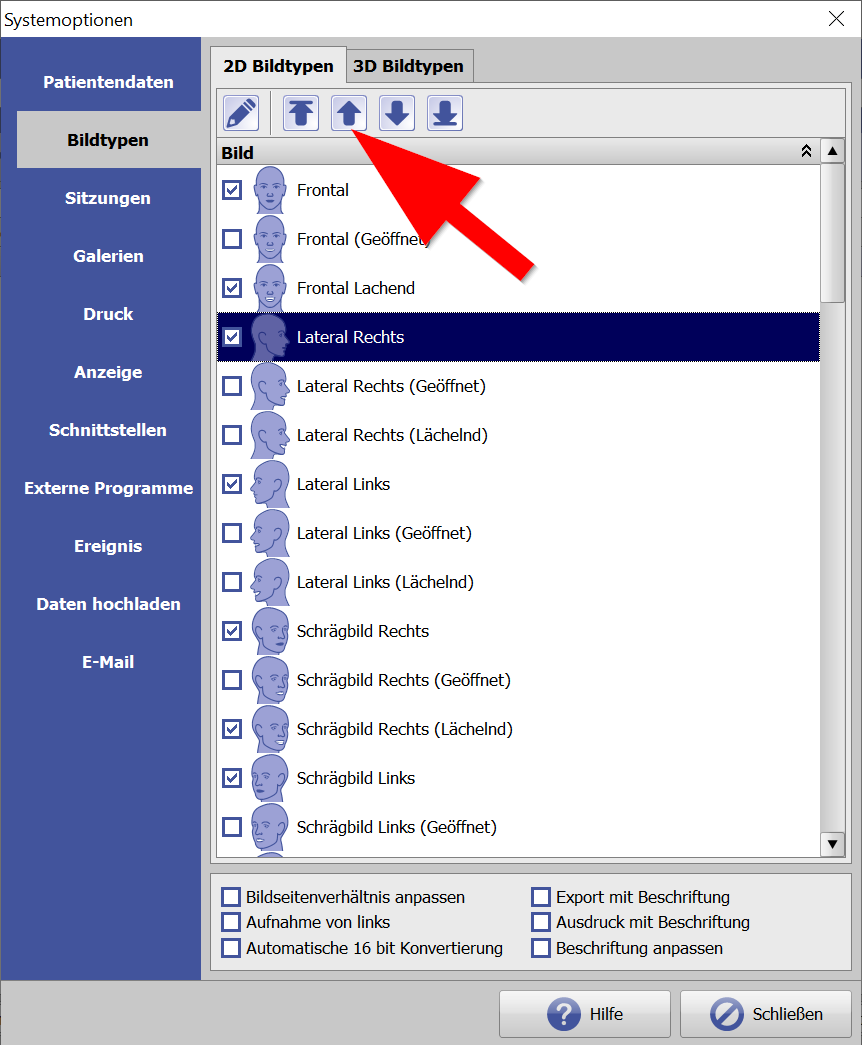
By default, the lateral image type in OnyxCeph is assigned the corresponding mirrored image type of the dentaleyepad (red arrow).
If you want to take your lateral exposures without mirrors, we recommend assigning the dentaleyepad image type “buccal left held” (i.e. without mirrors) to the OnyxCeph image type “occlusion left” (green arrow).
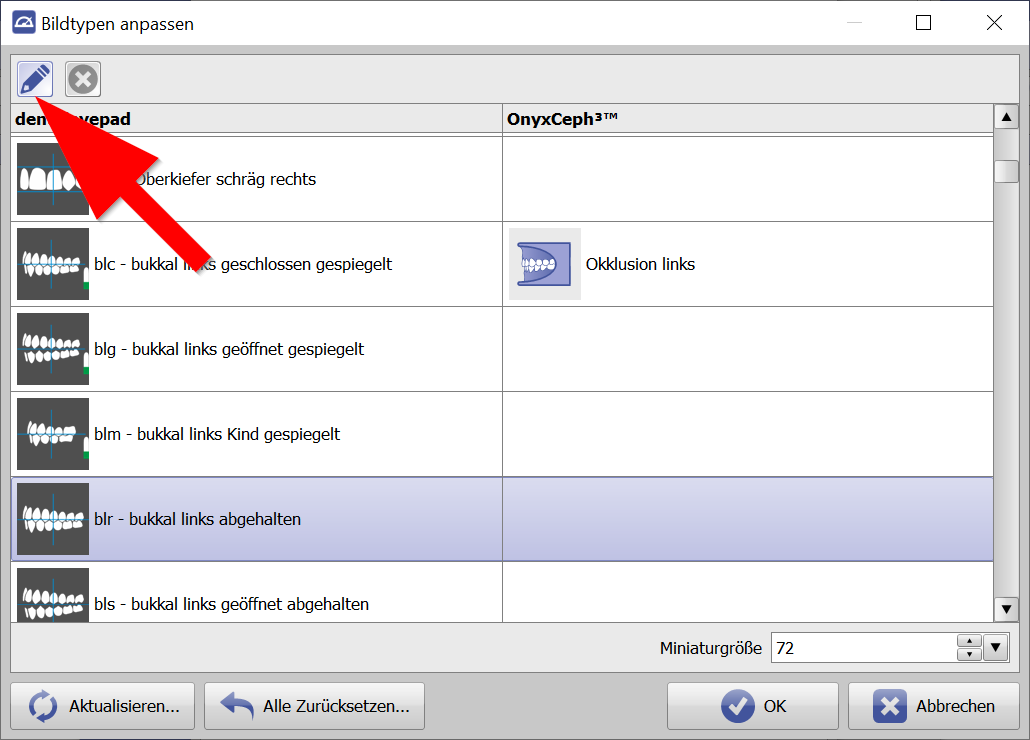
To do this, select the dentaleyepad image type “buccal left held” and click on the Edit button at the top left.
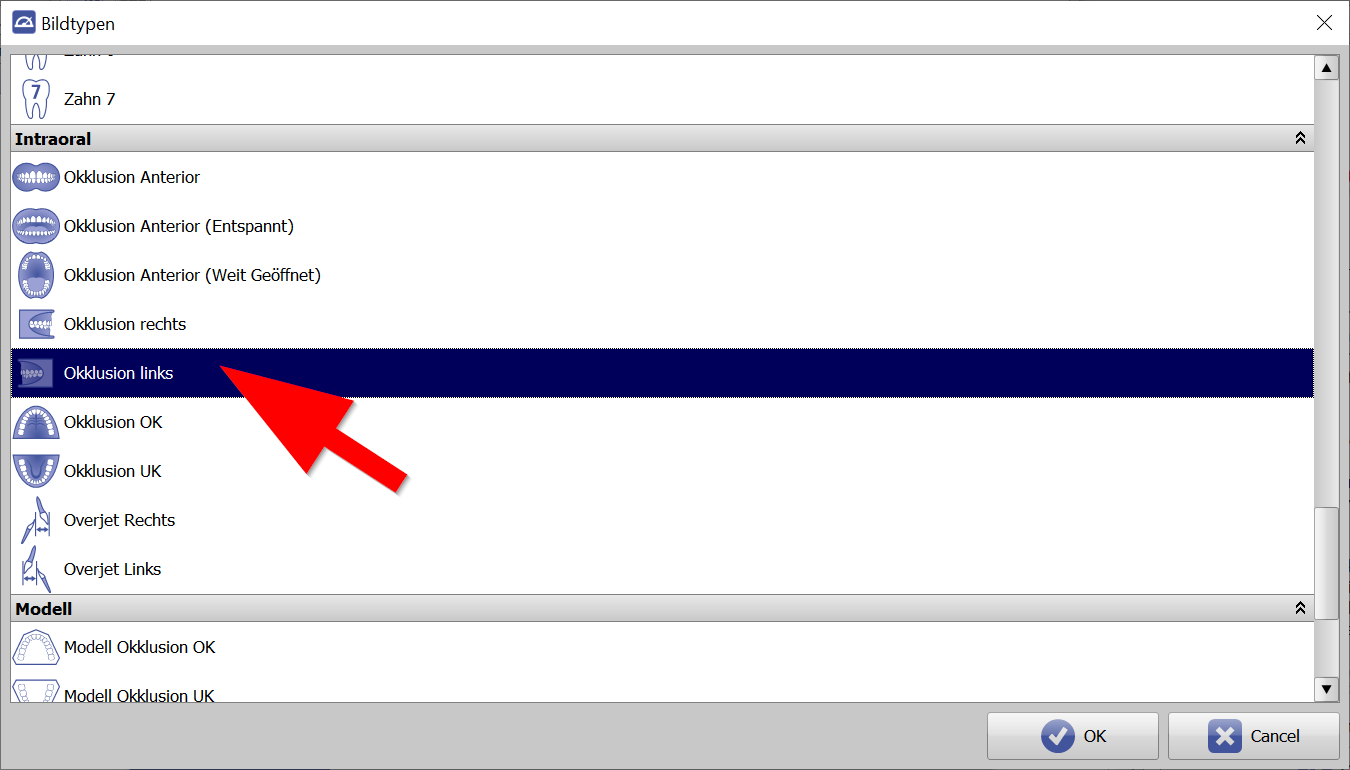
Now select the OnyxCeph symbol for “Occlusion left” again and confirm with “OK”.
Then switch back to the mirrored dentaleyepad image type, or select this line, and delete the entry on the OnyxCeph page with the cross button in the upper left corner.
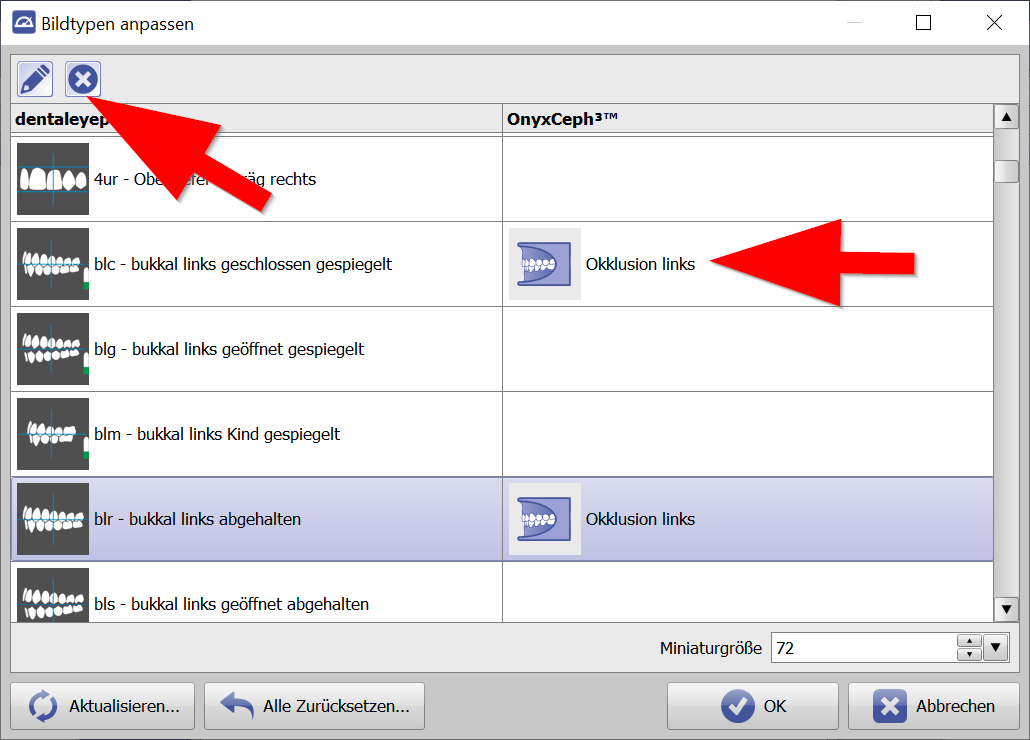
The result should then look like this.
If necessary, proceed analogously with the right lateral view.
Patient data transfer method:
In the Patient data field, you can decide whether you want to transfer the patient data to the dentaleyepad via transfer file or via QR code.
When should I take what?
If you have a very stable WLAN connection and only use one dentaleyepad in the practice, the transfer file is the right choice. All you need to do is press the patient button on the dentaleyepad and the current patient is displayed.
If the WLAN connection is not stable in all rooms, or if several dentaleyepads are to be used in the practice, we recommend handing over
via QR code.
Even if the WLAN should fail completely, the patient data can always be transferred by scanning the QR code. Scanning is very fast and does not delay the workflow.
If you use more than one dentaleyepad, there could theoretically be an overlap of the time windows if both call different patients at the same time. The QR code means that the assignment is always unique.
Alternatively, we now also offer the so-called multi-mode. Here could work without QR code. Before taking photos, however, you would have to select the appropriate room or workstation on the dentaleyepad where you are located. However, we recommend establishing a procedure that is as always the same as possible, such as scanning before photographing, so that you can as far as possible
little “thinking” has to be done.
This completes this setting area.
Since they are related in terms of content, here are a few words about the setting areas Image types and Sessions:
This button lets you edit each image type individually.
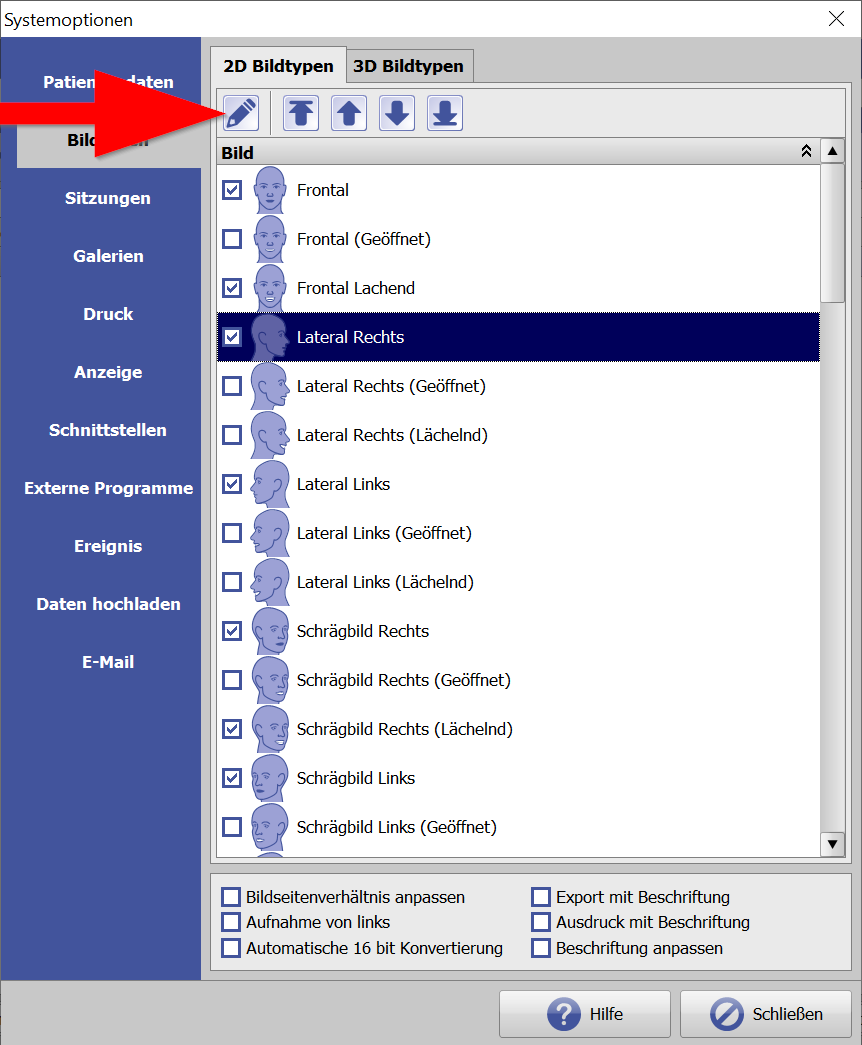
However, we recommend NOT to activate the items Flip horizontally and Flip vertically in the Image Acquisition area, since this has already been done by assigning the corresponding dentaleyepad image types.
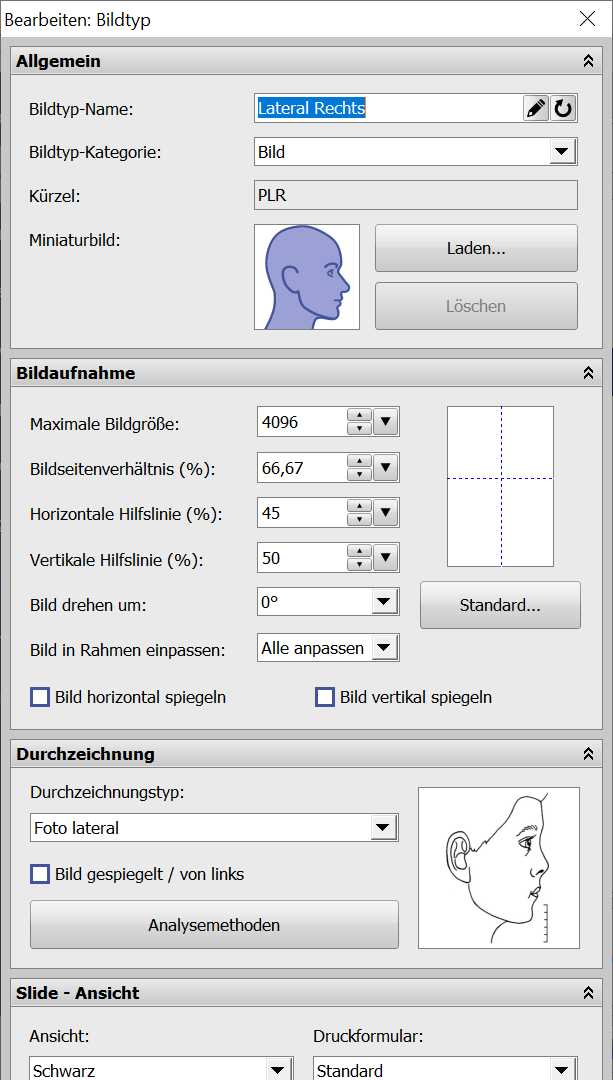
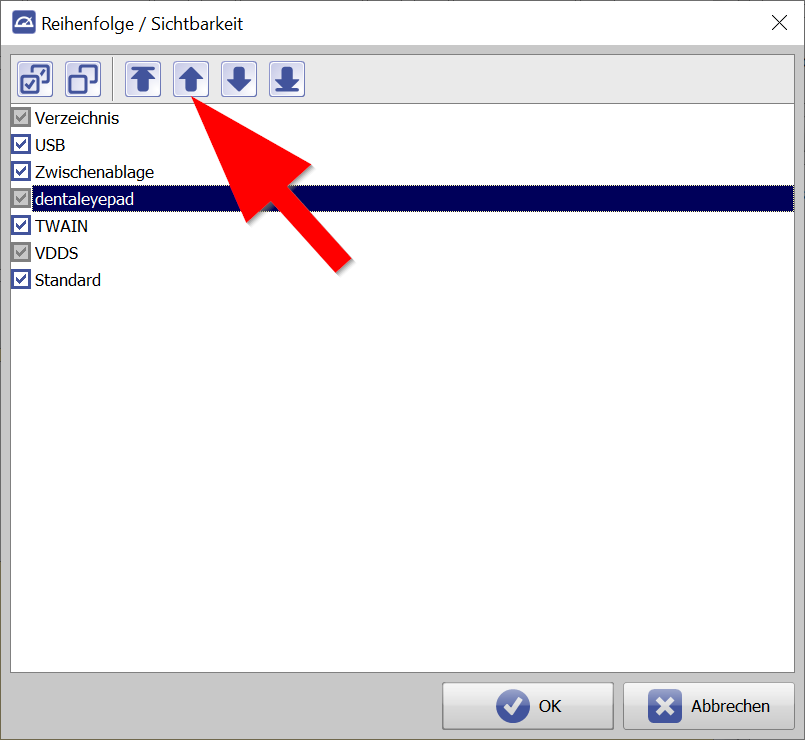
Use the arrow keys to determine the order in which the image types appear later in the OnyxCeph image view.
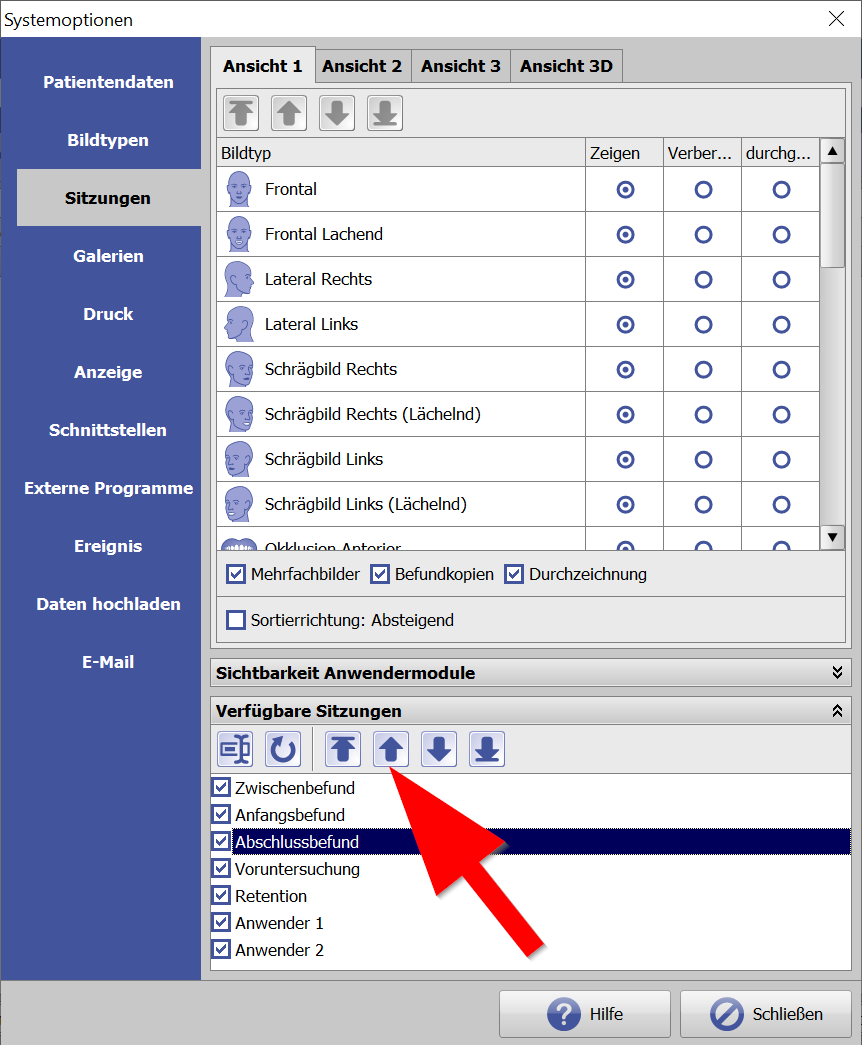
A word about session names:
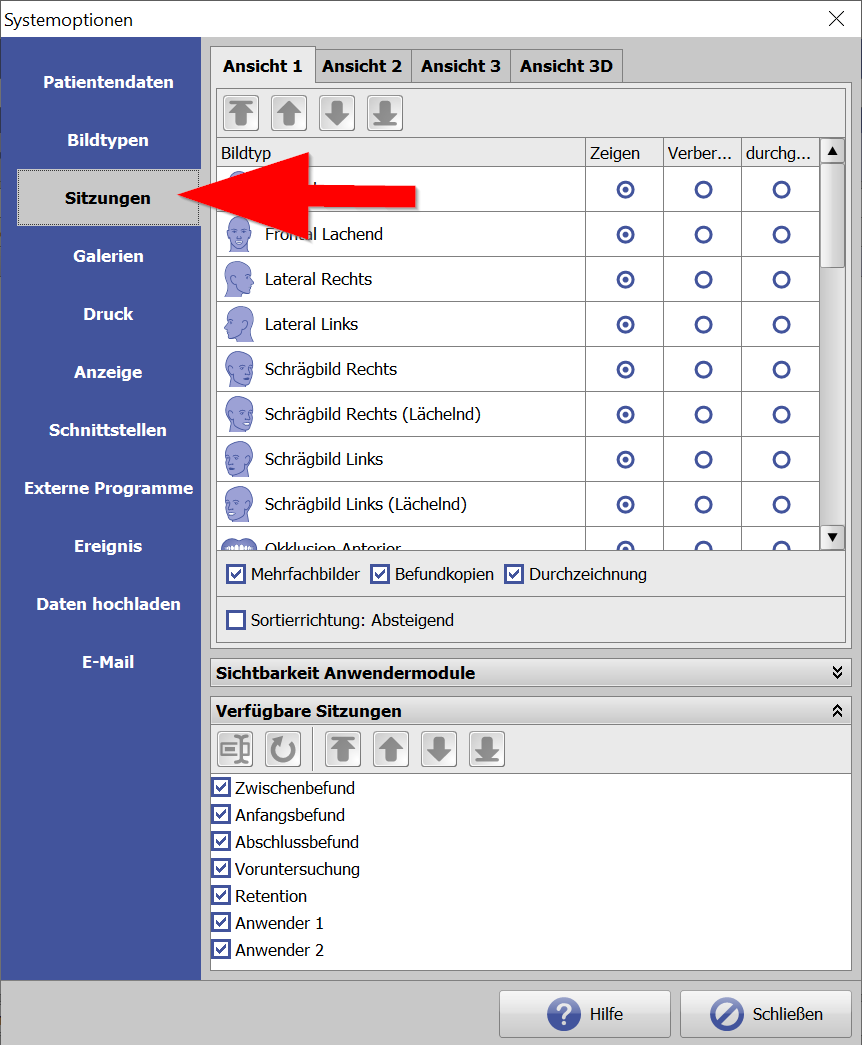
Use the arrow keys to determine the order in which the session names appear in the menu. The session name in the top row is the default value.
If no other is selected, it will be created by default.
New as of version from 13.03.2023 (OnyxCeph 3.2.195 Build 537):
If you name the workflows on the dentaleyepad exactly like the session names in OnyxCeph, then the sessions in OnyxCeph are automatically created with the corresponding session names with which photographs were taken on the dentaleyepad.
This means that in the future you will also save selecting the session type on the OnyxCeph page.
So much for the basic settings. Now we come to the actual image capture module:
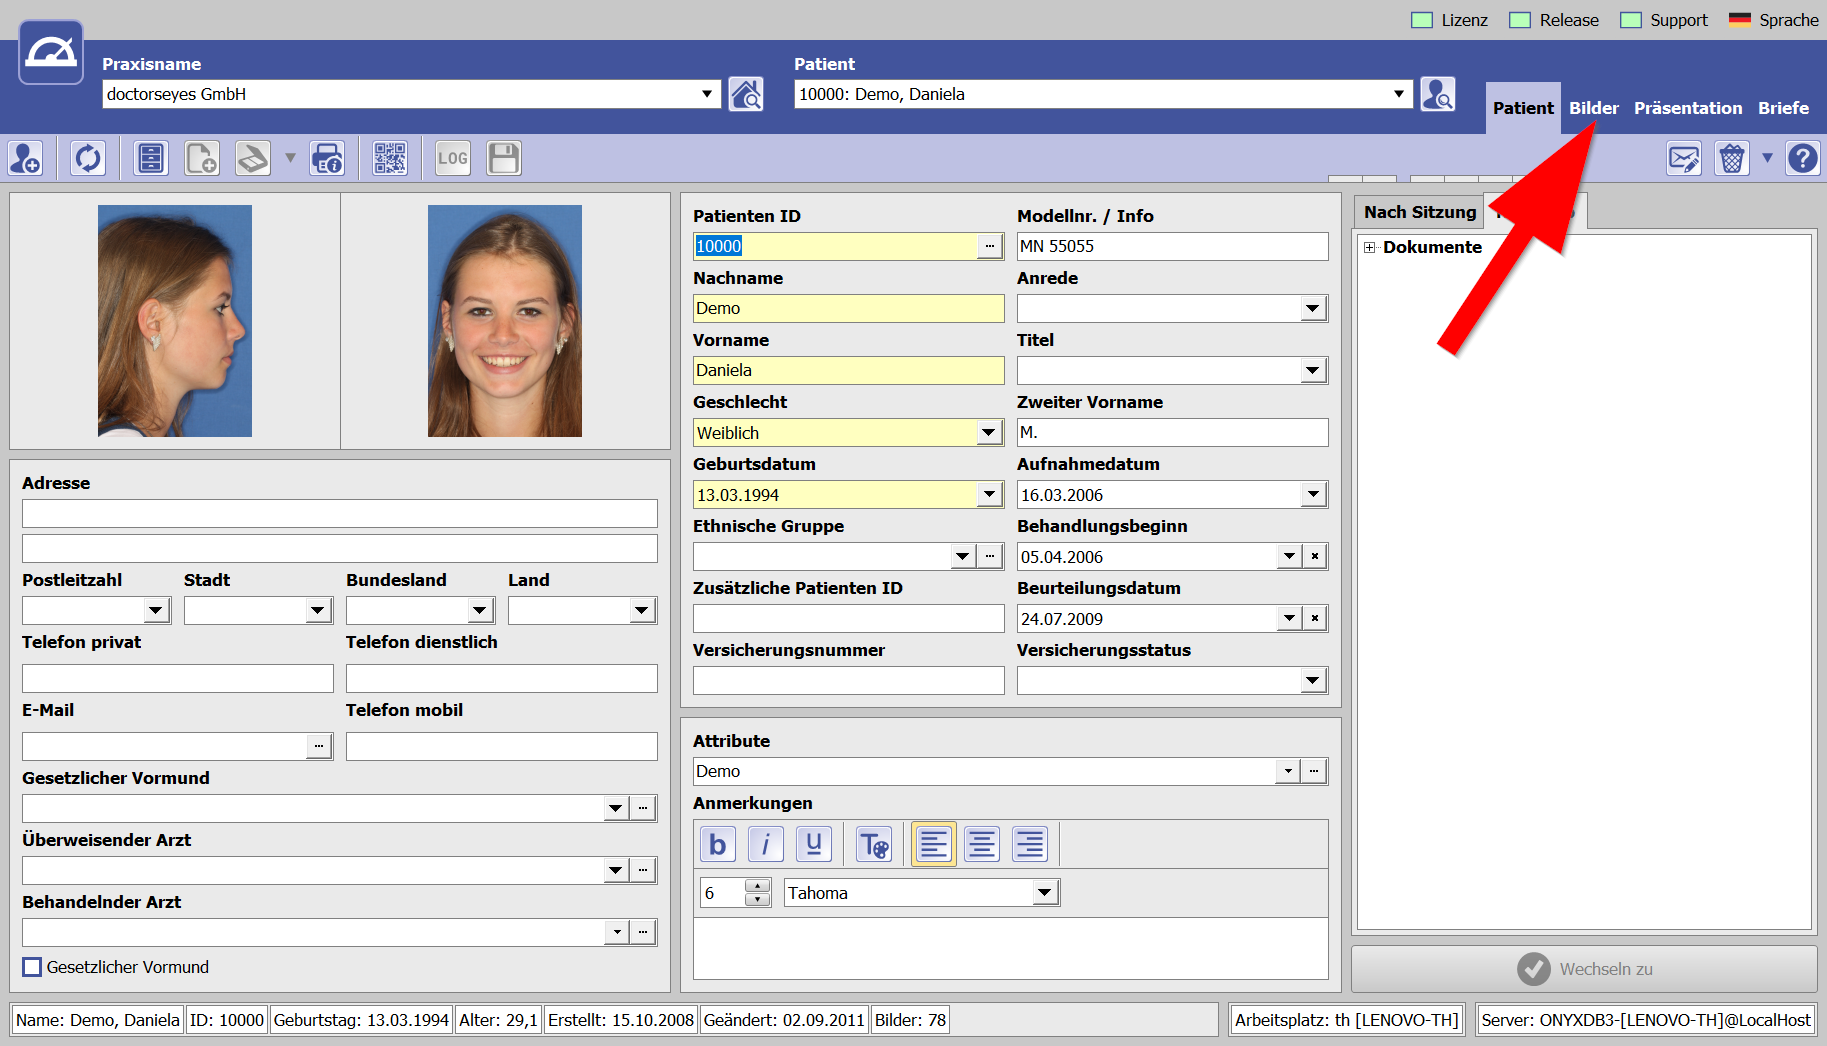
You can start this by switching to the Images section in the upper right corner of the patient…
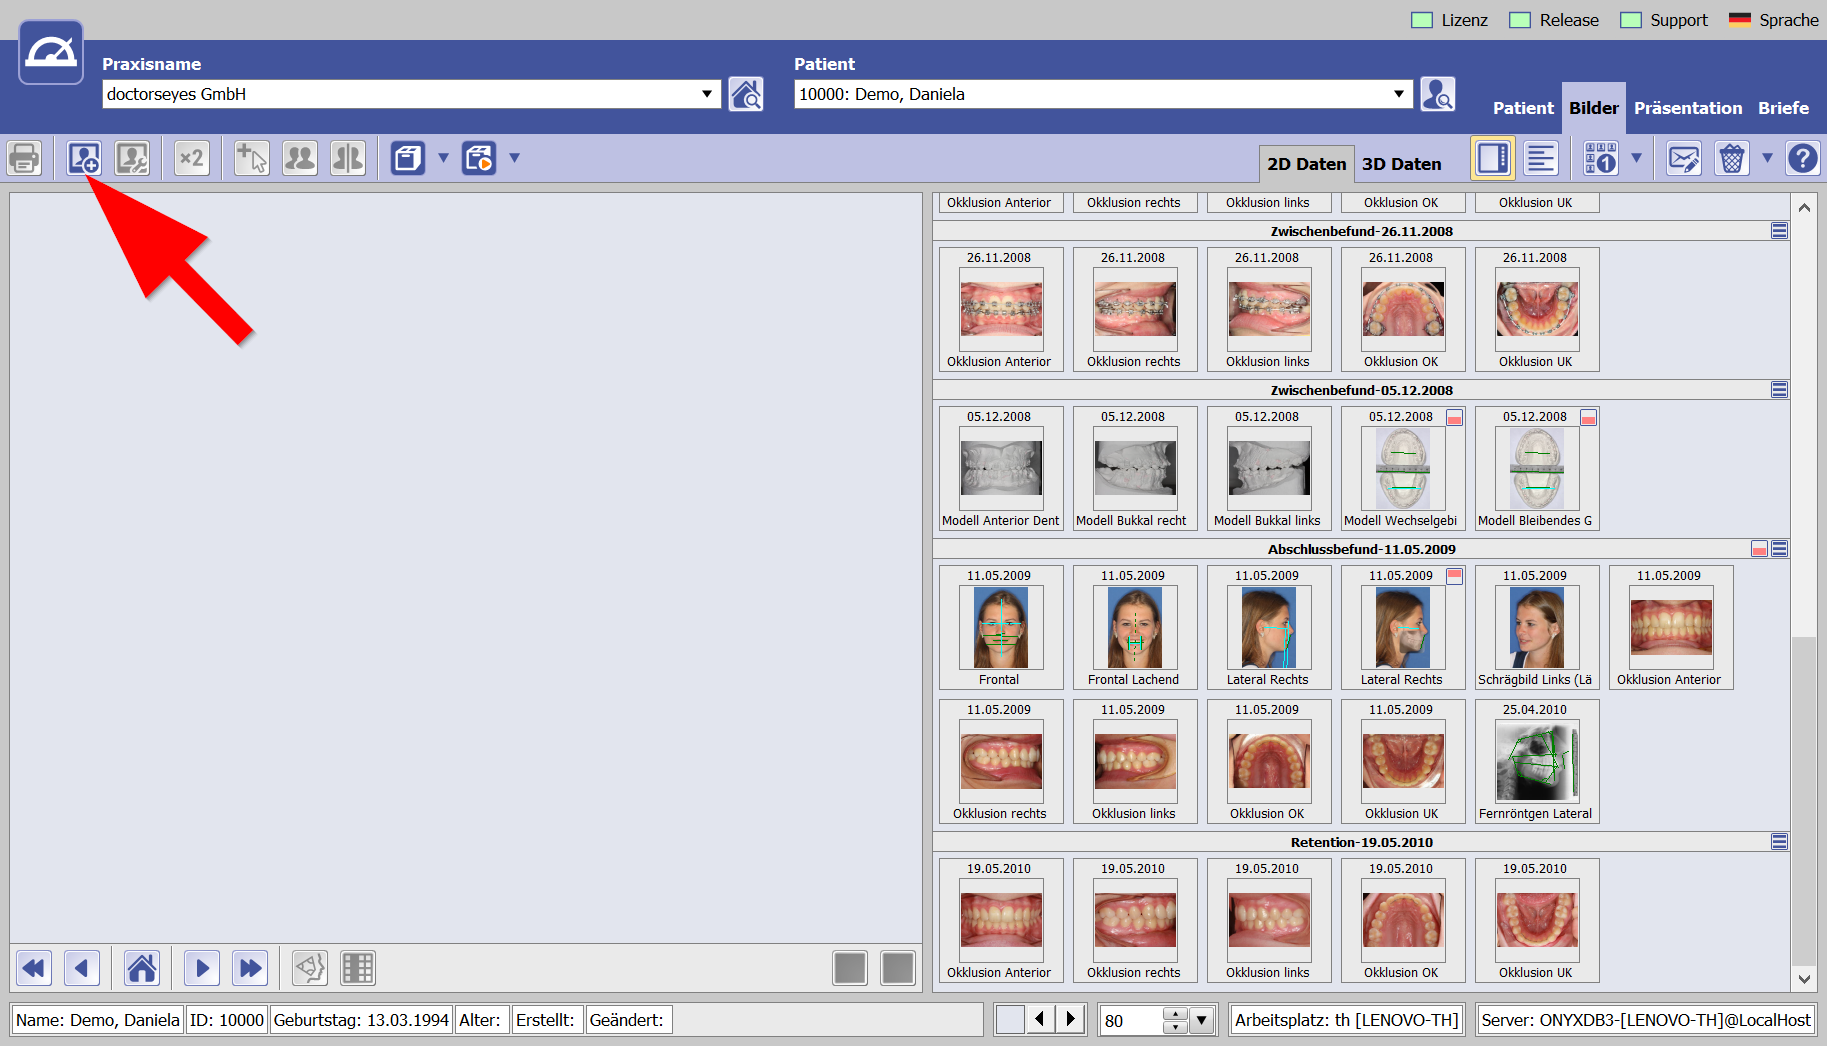
… and then select the “Add image” button in the upper left corner.
The blue and white dentaleyepad logo should now appear on the top right side. If it should not be visible, you can determine the order or the visibility of the tabs by right-clicking in the gray area, the order of the tabs.
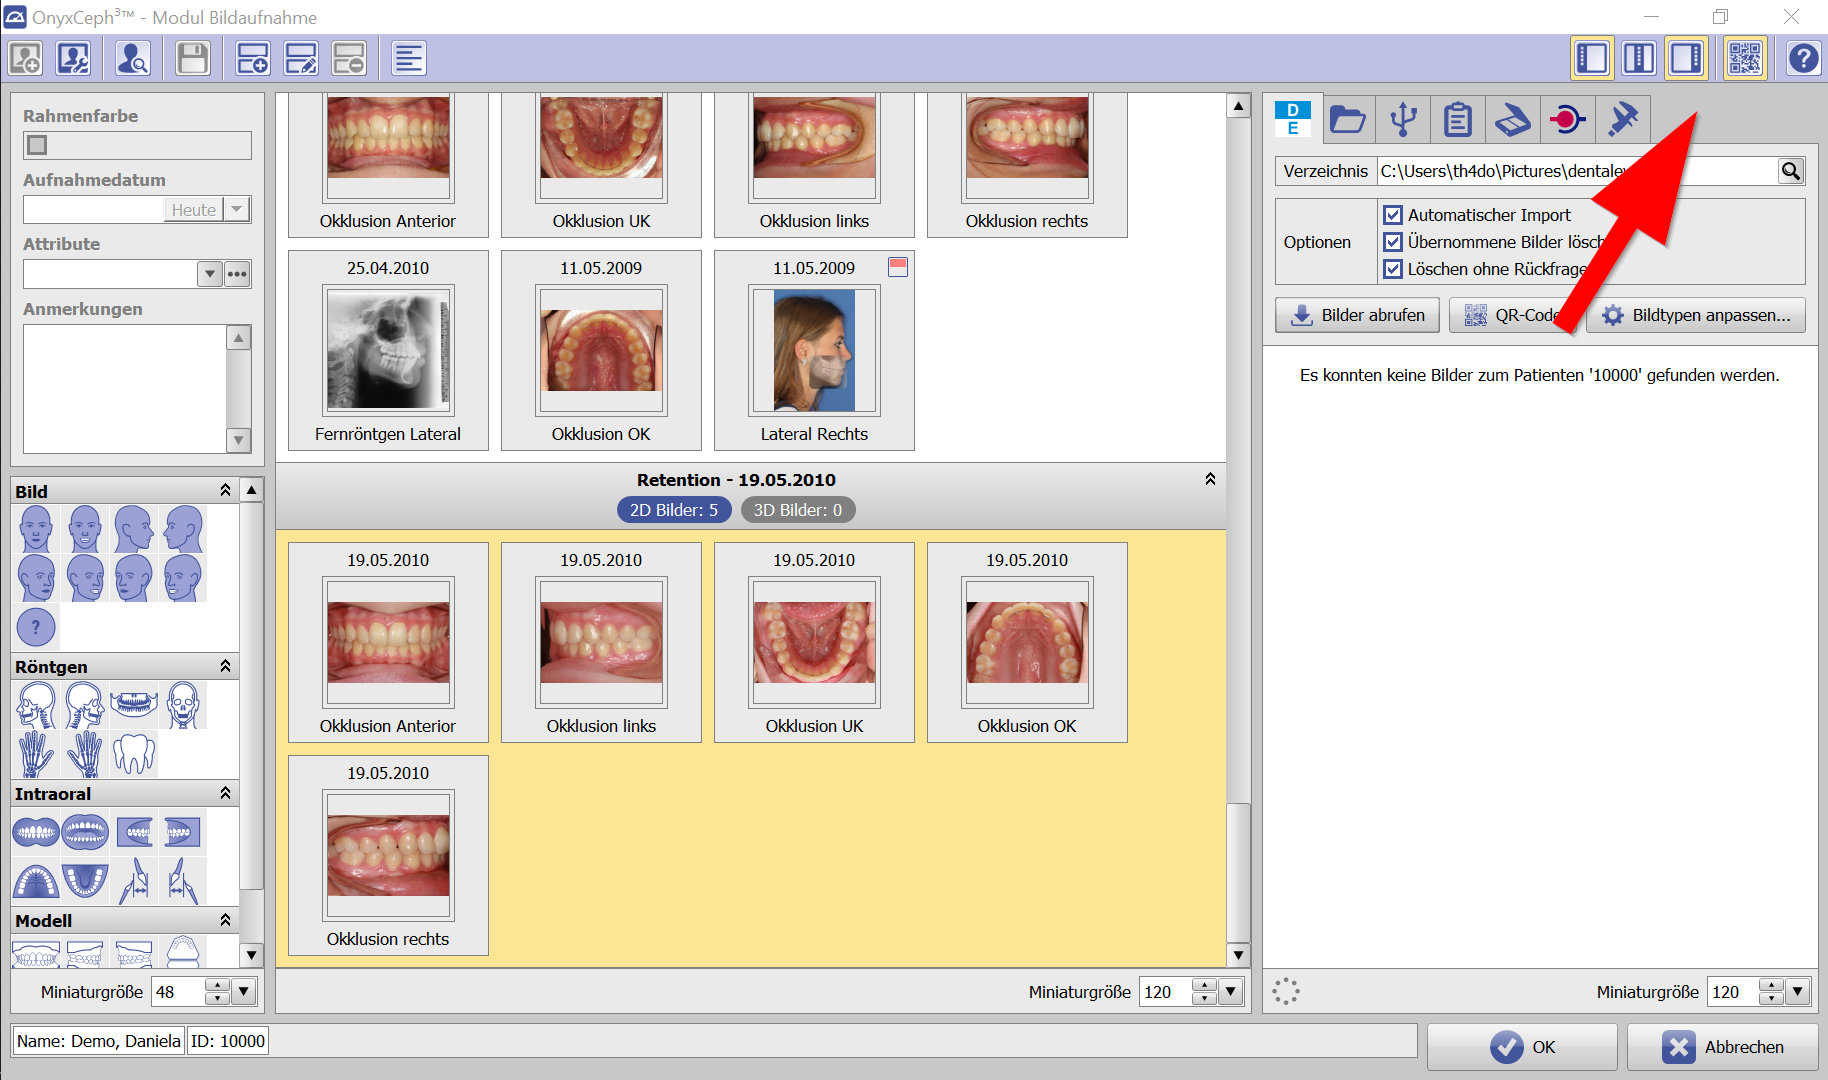
In the options area of the dentaleyepad tab, we recommend activating all three options:
Automatic import:
Here all images are automatically transferred to the left side in the session area.
Delete transferred images:
This option is important because the performance of OnyxCeph decreases if there are too many images in the list.
Delete without confirmation:
This option was introduced to save you click work.
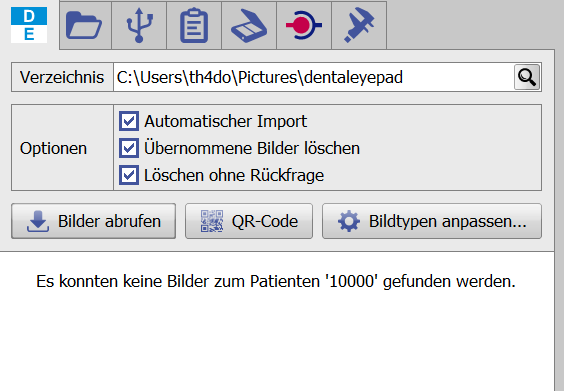
If you have selected the “CR code” transfer method for “Patient data”, you can start the QR code display with the button in the middle.
Have fun testing!